
Introduction
Managing different windows in embedded systems is a common need for advanced HMI (Human-Machine Interface) applications. For instance, an aircraft cockpit may require multiple pages to be displayed on several areas of the same physical screen.
Ansys SCADE Display is a model-based design tool for reliable and safe embedded HMIs. In this article, we’ll explore the concept of “hook” and show how, with the help of Ansys SCADE Suite for some underlying logic, we can define zones in a SCADE Display HMI and swap them around to reorganize the screen.
We will build a multi-zone embedded HMI that looks like this mockup:

The Hook
When someone mentions ‘hook,’ the first image that pops into my mind is Captain Hook chasing Peter Pan — not exactly what you’d expect in safety-critical HMIs. Fortunately, this article’s hook is much friendlier (and definitely safer), designed to simplify rather than terrorize.
In SCADE Display, a hook is a way to extend and customize reference object capabilities. Reference objects are reusable pieces assembled from graphical widgets. By default, they do not accept children in their structure tree. This makes it impossible to use a reference object as a container for other things.
However, when a reference object contains one or more hooks, it starts behaving as a container and can support children in its structure tree. An index allows to specify whether all children should be displayed, or just a single one:
-1 to display all childrenindex, starting from 0, to display a single child object
What’s interesting about this is that we can create a reference object capable of holding multiple child objects, and simply select which one to display using an index. We can then leverage this mechanism to dynamically control what gets displayed within a window or a specific section of our HMI.
Creating SCADE Display reference objects
We want to have multiple zones and the flexibility to swap content between these zones. So, what do we need for each zone? First, a hook to dynamically display the selected object. Second, a mask to ensure that our object doesn’t overflow into other parts of the HMI, especially if it’s larger than the designated zone.
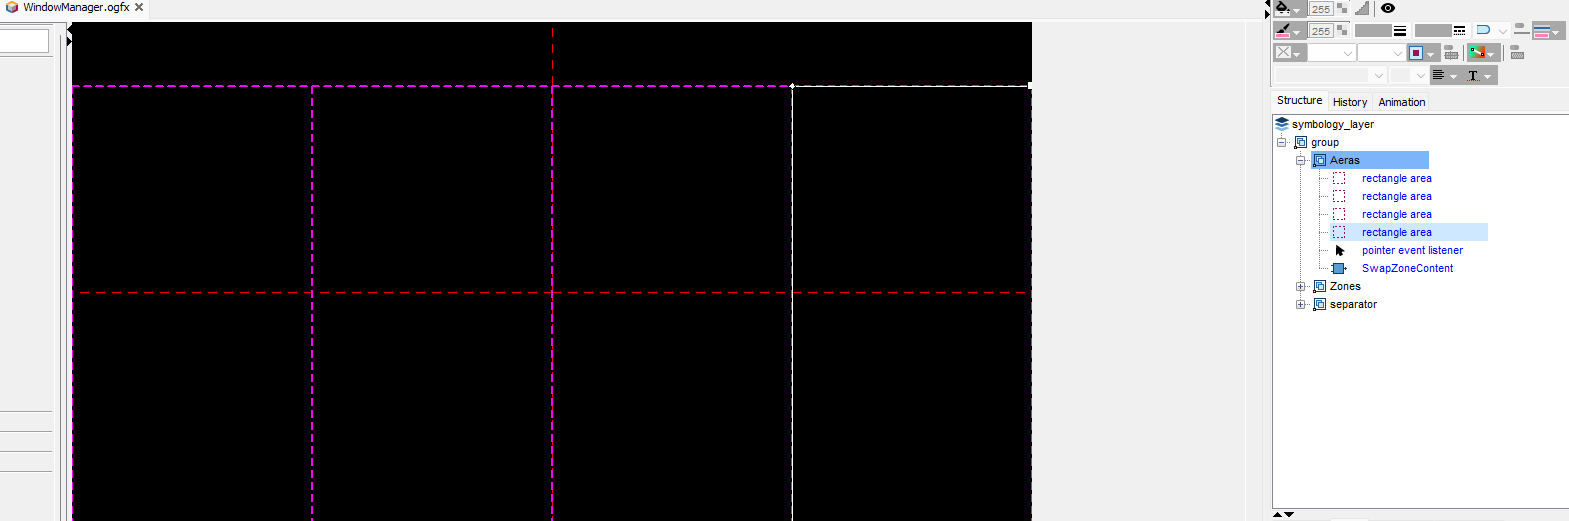
In our example, we’ll arbitrarily define four zones. To manage the indices of each hook object, we’ll use an array called zoneContent:
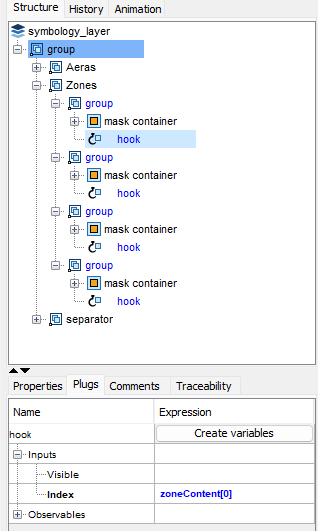
Structure of our WindowManager reference object
The separator group at the bottom contains a few lines to clearly visualize the boundaries of each zone.
Note: we could factorize the model even further — but that would mean creating “hooks of hooks” and I don’t want to lose you this early in the article! 😄
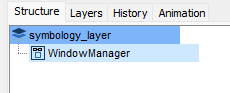
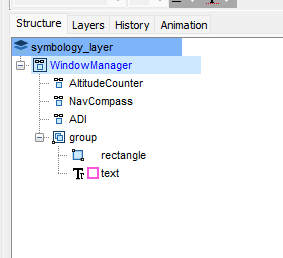
Now, let’s take a look at the resulting behavior. In our top-level graphical specification, we’ll instantiate our reference WindowManager object:
And add four child objects to it:
Now, let’s simulate the model and play around with the zoneContent variable:
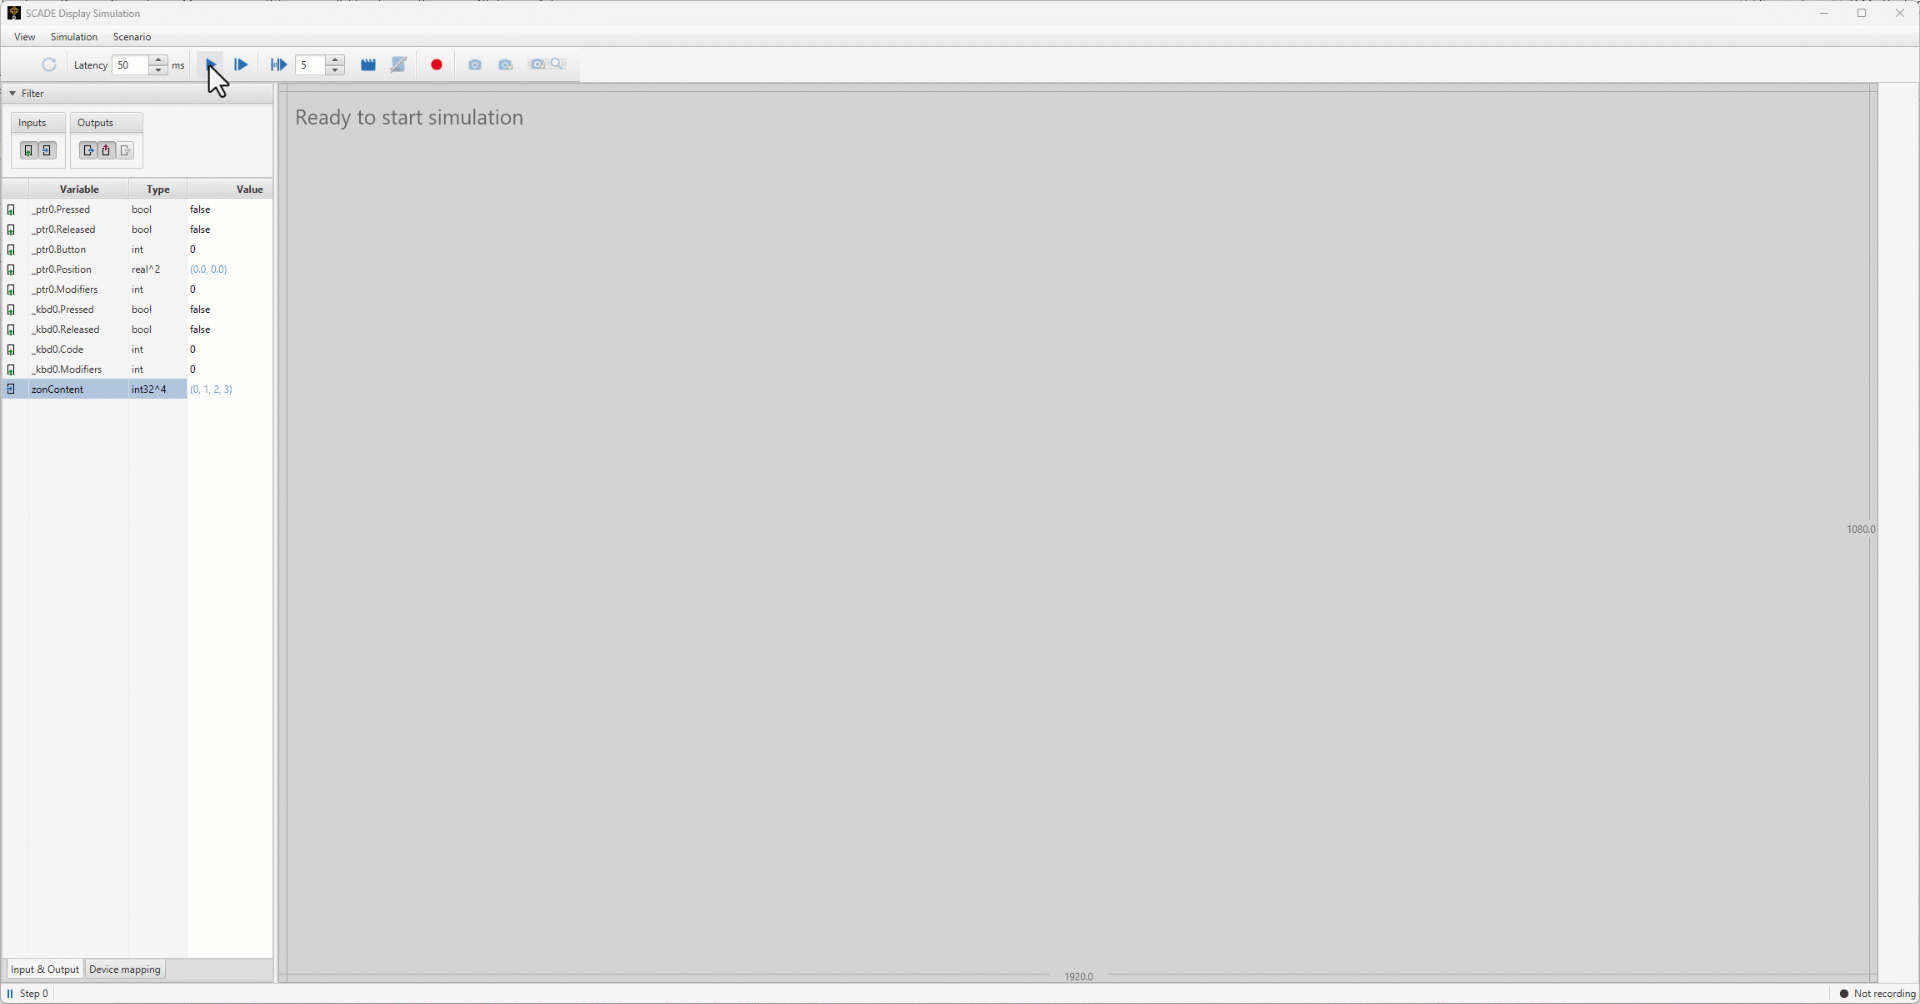
Fantastic! We now have the core functionality we wanted to implement. Let’s move on to the next step: adding some interactivity using SCADE Suite logic, allowing us to select two zones we’d like to swap.
Managing interactivity
On the SCADE Display reference object side, there’s not much left to do: we’ll just need to add a pointer event listener and define active areas for each zone, allowing us to identify which zone has been clicked/touched by the user at runtime:
SCADE Suite zone content swap behavior
Now, it’s time to create a model that will manage the swap between two zones. We’ll need a function to track which zone has been selected, and an algorithm to handle the swap logic: detect the selection by the user of a valid first zone, then a valid second zone — and finally, perform the swap. For that, we’ll also need a swap function that exchanges two elements in an array.
Zone ID management
This function returns the identifier of the clicked zone:

Swap mechanism
The swap algorithm is managed by a state machine with 4 states:
- Idle
- FirstSelection
- SecondSelection
- Swap

Full state machine (click to enlarge)
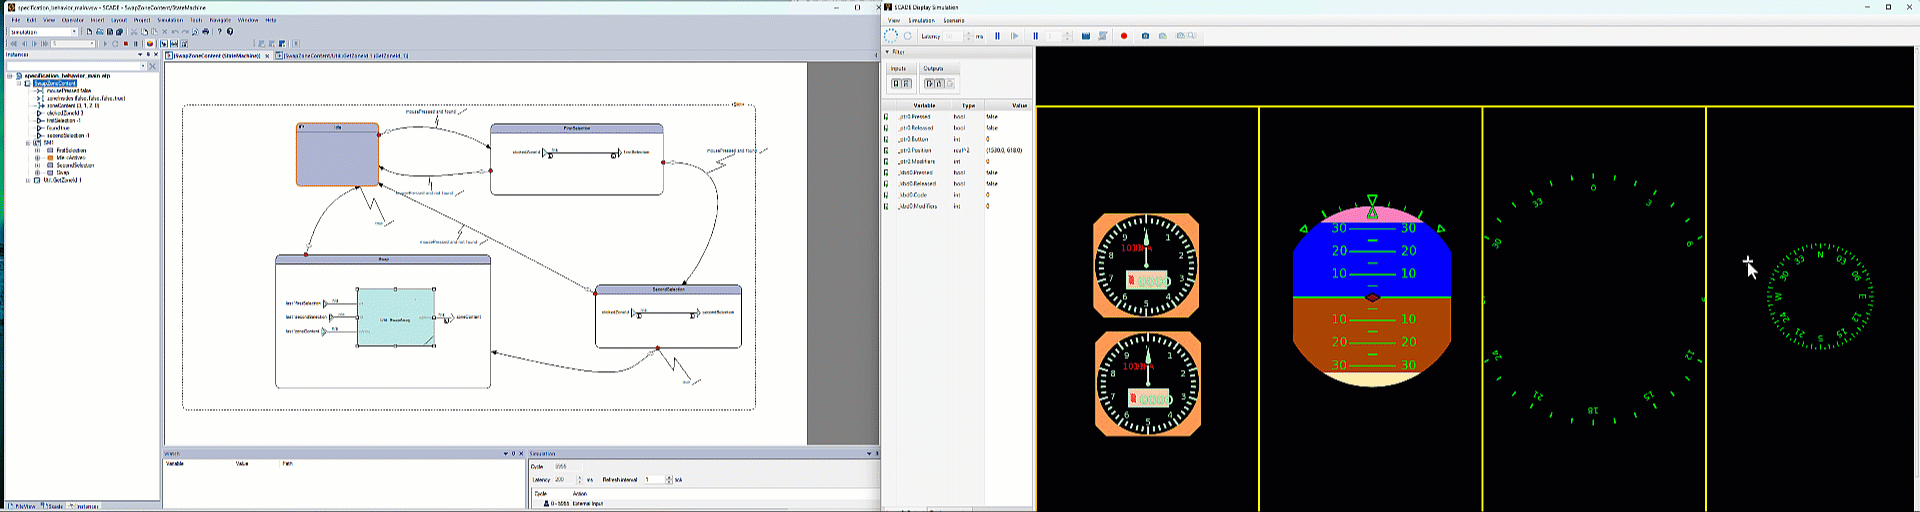
SCADE Display co-simulation
To validate the behavior of our HMI, SCADE Display allows for co-simulation with the behavior model. This makes it easy to quickly test and debug our setup. Here are the settings :

With the logic in place, we can now select two zones and successfully swap their content:
Conclusion
By combining the visual capabilities of SCADE Display with the logical power of SCADE Suite, we’ve built a flexible and interactive window management system — one that allows dynamic content swapping between multiple zones at runtime. This approach not only enhances the modularity of HMI design but also promotes maintainability and scalability for future developments. Whether you’re building a simple interface or a complex multi-view cockpit, this pattern provides a solid foundation for managing visual content in a structured and efficient way. All thanks to our new friend the “Hook” 😉.
In the meantime, if you want to experiment, you may download this article’s example model here (or browse its sources).
For more advanced use cases—such as shifting content around, reconfiguring the number of zones, or dynamically adjusting zone sizes—we invite you to explore the Mission Computer example model. It will be publicly available on our GitHub in a few weeks, and is already accessible upon request.
If you wish to know more about how SCADE Display can improve your embedded design workflow, you may contact us from the Ansys SCADE Display page.
About the author
|

|
Ludovic Oddos (LinkedIn) is a Lead Product Specialist at Ansys. He has been supporting SCADE field engagements, in many industries, for more than 15 years. He has deep expertise in embedded software and its integration into various target environments.
|


