
Introduction
Rendering live video streams or video files in embedded display systems is a common need for advanced HMI (Human-Machine Interface) applications. Ansys SCADE Display is a model-based design tool for reliable and safe embedded HMIs. When combined with OpenCV (Open-Source Computer Vision library), it can display live video streams (from a webcam or a file) within an embedded graphical panel.
In this article, we’ll explore how to integrate live video streams from webcams or video files into Ansys SCADE Display using the OpenCV library. We’ll leverage the capabilities of OpenCV to capture video frames, convert them into OpenGL textures, and then render these textures within SCADE Display.
Concept
In SCADE Display, graphical objects such as textured rectangles can be used to render video frames. To achieve this, we will use the following workflow:
- Create a graphical object (textured rectangle) in SCADE Display that will serve as the canvas for rendering the video.
- Update the texture of this rectangle with each video frame obtained from OpenCV.
- Call runtime rendering logic, implemented as custom C code that integrates OpenCV and OpenGL/OGLX, where OpenCV handles video capture and OpenGL renders the texture onto the rectangle.
This integration allows SCADE Display to offload the frame capturing to OpenCV while using OpenGL for efficient rendering.
SCADE Display Reference Object Creation
First, we create a SCADE Display model with a graphical specification. In it, we design a rectangle that will serve as the video output screen. This rectangle will continuously update with new textures, which correspond to the frames of the video stream. We assign an OpenGL texture ID to it, which will be updated at runtime.
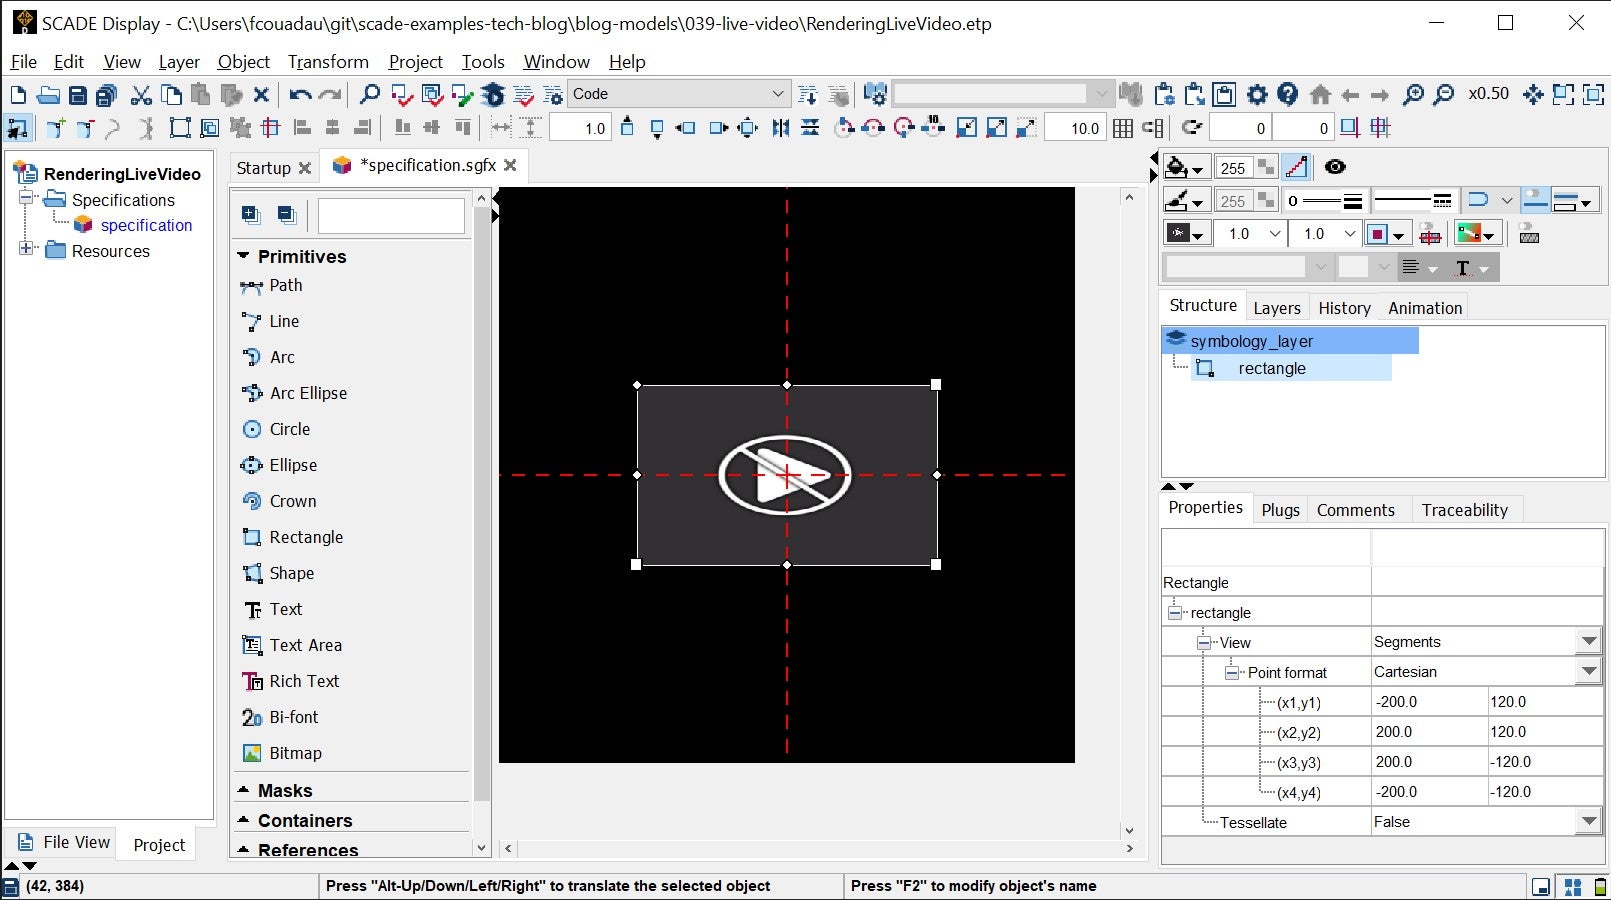
Next, we add an Imported Code Block. This non-graphical widget invokes an external, user-defined C function. This function will integrate OpenCV for capturing video frames, handle video decoding and transfer frame data to the OpenGL texture. SCADE Display will call this function on every frame update, ensuring that the texture is continuously refreshed with new video data.
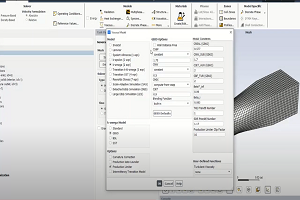
In this case, we want to display video from a local AVI file. We place it in the same folder as our SCADE Display model, under video/bump.avi. We then configure our Imported Code widget as follows:
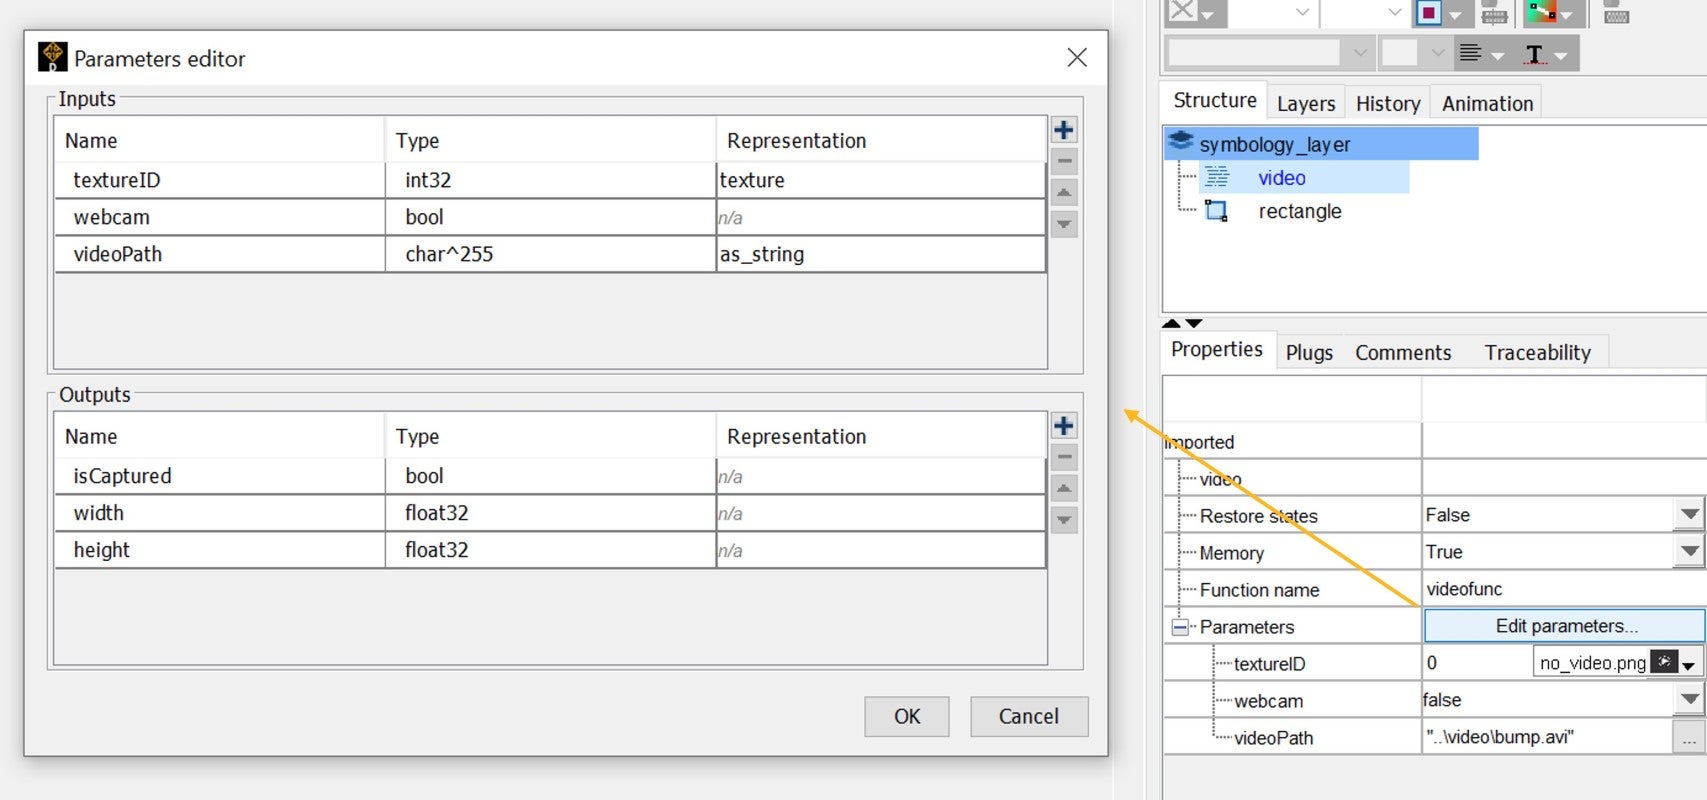
Note that the path of the video file is relative to our imported C function. In this case, we must add a .. at the beginning of it to go back up to our root folder level.
Imported Code Explanation
At this stage, it’s worth having a deeper look at our imported C code.
In our project’s folder, we have created a src folder into which we have added our manual C code. The core of it is our videofunc function, which is copied below:
void videofunc(SGLint32 textureID, SGLbool webcam, SGLuint8 videoPath[255UL], SGLbool *isCaptured, SGLfloat *width, SGLfloat *height, videofunc_mem *mem)
{
    if (mem->init) {
        mem->init = 0;

        // Initialize capture based on whether webcam or video file is used
        if (webcam) {
            mem->g_Capture  = cvCreateCameraCapture(0);  // Capture from webcam
            *width = 640.0;
            *height = 480.0;
        } else {
            mem->g_Capture = cvCreateFileCapture(videoPath);  // Capture from video file
            *width = cvGetCaptureProperty(mem->g_Capture, CV_CAP_PROP_FRAME_WIDTH);
            *height = cvGetCaptureProperty(mem->g_Capture, CV_CAP_PROP_FRAME_HEIGHT);
        }

        // Check if capture is successful
        if (!mem->g_Capture) {
            *isCaptured = 0;  // If not successful, return capture failure
        }
    } else {
        // Capture a new frame
        IplImage *image = cvQueryFrame(mem->g_Capture);

        if (image) {
            // Flip the frame vertically (to align OpenGL coordinate system)
            cvFlip(image, NULL, 0);

            // Convert the frame from BGR to RGB (OpenCV stores images in BGR format)
            cvCvtColor(image, image, CV_BGR2RGB);

            // Create and update the OpenGL texture using the video frame data
            sglTexImage2Dubv(textureID, SGL_BITMAP_RGB_NOT_TRANSPARENT,
                image->width, image->height, (SGLbyte *) image->imageData, SGL_REPEAT);

            *isCaptured = 1;  // Mark that the frame was successfully captured and displayed
        } else {
            // Loop the video if the end is reached
            cvSetCaptureProperty(mem->g_Capture, CV_CAP_PROP_POS_AVI_RATIO , 0);
        }
    }
}
Here’s a breakdown of this function:
- Initialization: The function begins by checking if it’s the first time the video capture is being initialized. If so, it starts capturing either from a webcam or a video file, based on the
webcam parameter. The resolution of the video (width and height) is retrieved and passed to the calling function. If the video capture fails (e.g., if the webcam is not available or the video file is invalid), the capture flag isCaptured is set to 0.
- Frame Processing: Once initialized, the function captures a frame from the video using
cvQueryFrame. The frame is flipped vertically to match the OpenGL coordinate system. The color format is converted from OpenCV’s default BGR to RGB, which is required by OpenGL for proper rendering.
- Texture Creation: The
sglTexImage2Dubv function is used to create or update the OpenGL texture associated with the textureID using the captured frame’s data. The video frame is rendered as an OpenGL texture onto the textured rectangle in SCADE Display.
- Looping: If the video reaches its end, the playback position is reset to the beginning to create a loop effect.
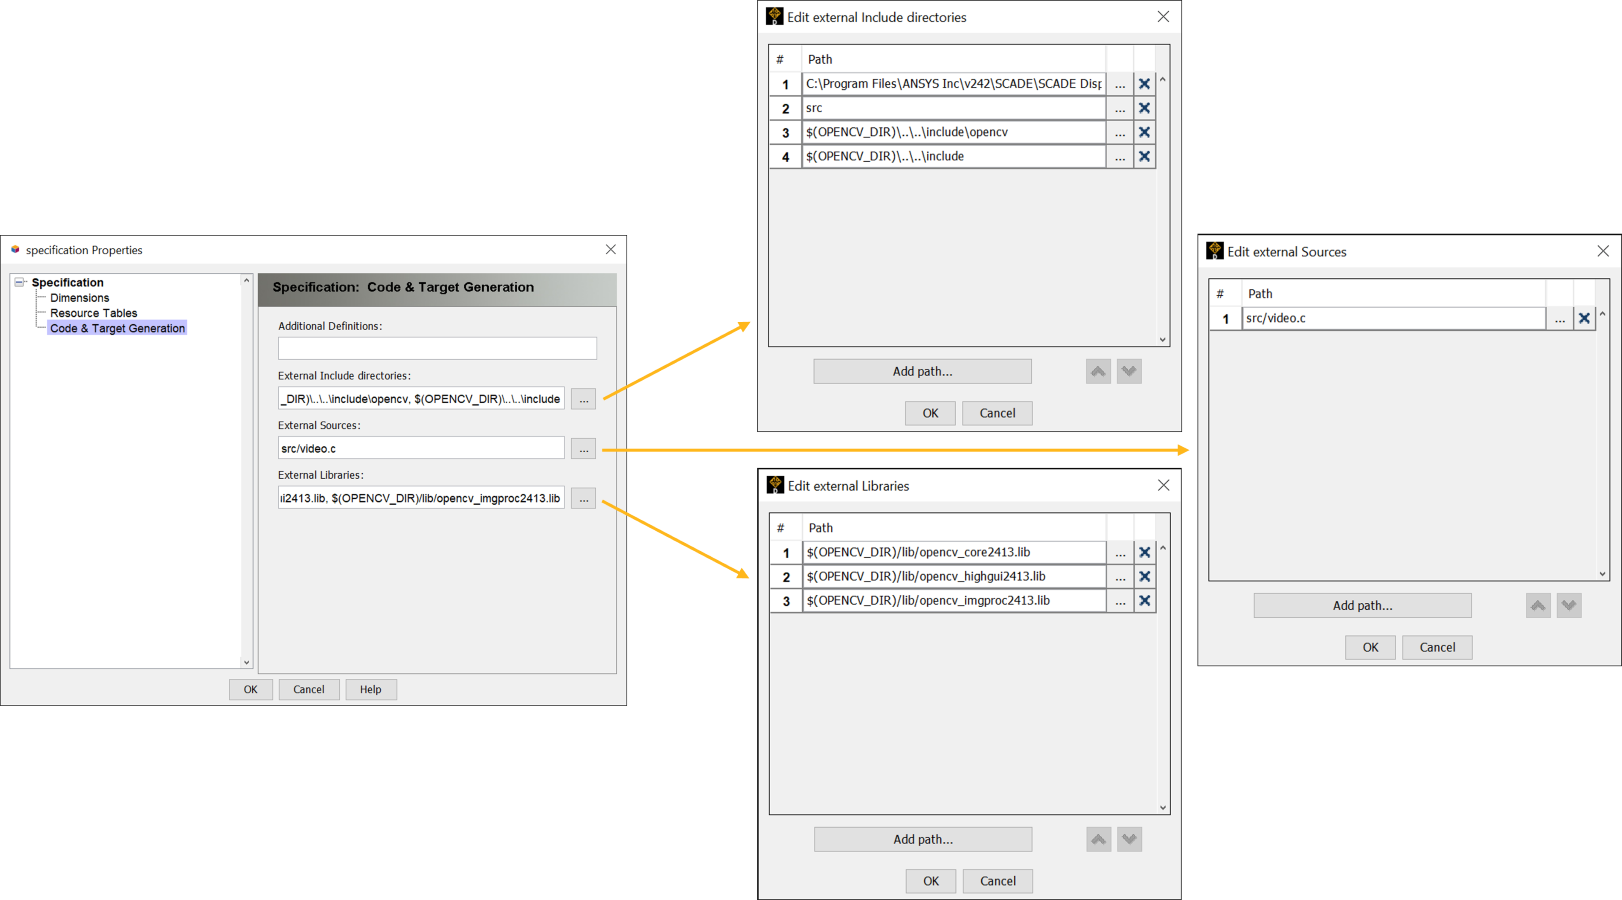
Compiling and Running the Program
To compile and run this program, we install OpenCV 2.4.13, downloading it from the OpenCV website.
We then set up the required environment variables to add OpenCV to our Windows PATH:
%OPENCV_DIR%=c:\opencv\build\x64\vc14
%PATH%=%OPENCV_DIR%\bin;%PATH%
Next, we update the properties of our SCADE Display specification as follows:
Finally, we restart SCADE Display for our new environment variables to be registered, select the “Windows” launch configuration of our model, and click Execute. SCADE Display generates, compiles, builds and runs the application:

And voila! Our graphical panel executes and we see our video looping:
Explore further
In this article, we saw how to integrate OpenCV with Ansys SCADE Display to render live video streams. This simple yet powerful integration is suitable for a wide range of embedded HMI applications, from live camera feeds to playback of local video files.
If you want to experiment, you may download this article’s example model here (or browse its sources).
If you’d like to know more about how Ansys SCADE Display can improve your embedded HMI design workflow, you may contact us from the Ansys SCADE Display page.
About the author
|

|
Ludovic Oddos (LinkedIn) is a Lead Product Specialist at Ansys. He has been supporting SCADE field engagements, in many industries, for more than 15 years. He has deep expertise in embedded software and its integration into various target environments.
|


