Introduction
Like most Ansys products, SCADE comes with a comprehensive Python API. It allows you to programmatically use SCADE to automate tasks (e.g. setting up a CI/CD toolchain for your SCADE models).
In this article, we’ll explore how to set up your favorite Integrated Development Environment (IDE) to write and debug Python code interacting with SCADE.
Requirements
To get started, you’ll need access to SCADE dev docs, a working installation of SCADE, a sample Python script to test that all works as intended, and of course, your trusty IDE. Let’s tick these off one by one.
SCADE Python API docs
As a developer, your go-to page for working with SCADE should be developer.ansys.com/scade. On there, you will find key resources such as the SCADE Python API Guide.
At the time of this writing, the page points to the guide for version 2023 R2.
The API allows you to:
- Programmatically read and modify SCADE models, test results, and generated artifacts.
- Run SCADE jobs such as code generation or model testing.
A local SCADE installation
To interact with SCADE, you need a local installation of the SCADE product.
It comes with:
- A distribution of Python. For instance, SCADE 2023 R2 embeds Python 3.10 64bit under
/contrib/Python310
- A Python implementation of the SCADE API library, under
/SCADE/APIs/Python/lib
- Binary executables that will be used to execute some functions of the API (e.g. code generation), under
/SCADE/bin
Note: you may use your own distribution of Python instead of the one provided with SCADE. Should you opt for this, please make sure you extend your PYTHONPATH environment variable with the above directories.
A sample starter script
Let’s get started with a basic script template that opens a SCADE project and sets it up for use through the API. It will allow you to verify that your IDE setup is correct and functional.
First, we need to load the project itself, represented by a .etp file on disk.
When using your IDE of choice, you’ll need some preamble code to explicitly load a project:
##

# identical to scade -script   ...

import scade_env

scade_env.load_project('path/to/my/scade/project.etp')

##
Note: SCADE supports running Python scripts directly from its user interface (known as SCADE Studio) or from the command line:
scade.exe -script ... []
In both cases, the project is automatically loaded by the SCADE executable before the Python script starts. Therefore, there is no need to explicitly load a project and the load_project call is simply ignored.
Next, we’ll import some API modules:
import scade.model.project.stdproject as project

from scade import output
Note: SCADE comes with two project APIs:
scade.model.project.natproject: Pure Python API.scade.model.project.stdproject: SCADE Studio API.
The documentation advises importing scade.model.project which resolves to one of the above APIs depending on the name of the executable running the script: vcs.exe or stdtcl.exe on one hand, any other executable like python.exe on the other hand.
In our sample script however, importing stdproject directly ensures that scripts behave the exact same way, whether they are launched from a SCADE environment or an external Python environment.
Finally, we can add some basic statements to navigate the model and print some information:
projects = project.get_roots()

for p in projects:

  assert isinstance(p, project.Project)

  output(p.pathname + 'n')
Note: The assert statement may help your IDE’s IntelliSense / auto-completion realize that p is of type Project.
Here is the final script, all put together:
##
# identical to scade -script ...
import scade_env
scade_env.load_project('path/to/my/scade/project.etp')
##
import scade.model.project.stdproject as project
from scade import output
projects = project.get_roots()
for p in projects:
assert isinstance(p, project.Project)
output(p.pathname + 'n')
Setting up your favorite IDE
Now that we have the basics, let’s look at setting up your IDE. In this article, we’ll look at three popular ones: Visual Studio Code (or VS Code), PyCharm and Visual Studio.
Visual Studio Code
Visual Studio Code (code.visualstudio.com) is a free open-source IDE. It is popular because of its customizability through numerous extensions.
Installation
Install & launch the IDE, then install the Python extension:
- Open the Extensions panel with Ctrl + Shift + X
- Type ‘python’ in the search field
- Click ‘install’ for extension ‘Python’

Installing the Python extension
Project creation & configuration
A VSCode project, or more precisely a workspace, is a directory. Simply drag and drop a directory containing the above test script onto the IDE window to initialize a Python project.
In your project, create a folder called .vscode.
Inside folder .vscode, create a file called settings.json with the following content:
{

  // Use Python interpreter embedded with SCADE

  "python.defaultInterpreterPath": "/contrib/Python310/python.exe",

  // Enable Intellisense autocomplete

  "python.autoComplete.extraPaths": [

    "/SCADE/bin",

    "/SCADE/APIs/Python/lib"

  ],

  "python.analysis.extraPaths": [

    "/SCADE/APIs/Python/lib"

  ]

}
This tells VSCode to use the Python interpreter embedded with SCADE and enables autocomplete for the SCADE API.
Inside folder .vscode, create a file called launch.json with the following content:
{

  "version": "0.2.0",

  "configurations": [

    {

      "name": "Python: Current File",

      "type": "python",

      "request": "launch",

      "program": "${file}",

      "console": "integratedTerminal",

      "justMyCode": true,

      "env": {"PYTHONPATH": "/SCADE/APIs/Python/lib;/SCADE/bin"},

    }

  ]

}
This ensures that the SCADE API library is used at runtime.
Your VSCode project structure should now look as follows:
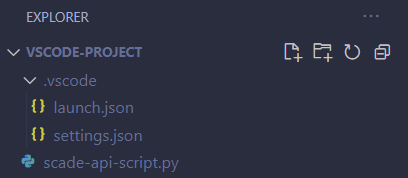
VSCode project structure
Results
You may run and/or debug your Python script. The debug view allows you to peek into the variables and their structure:
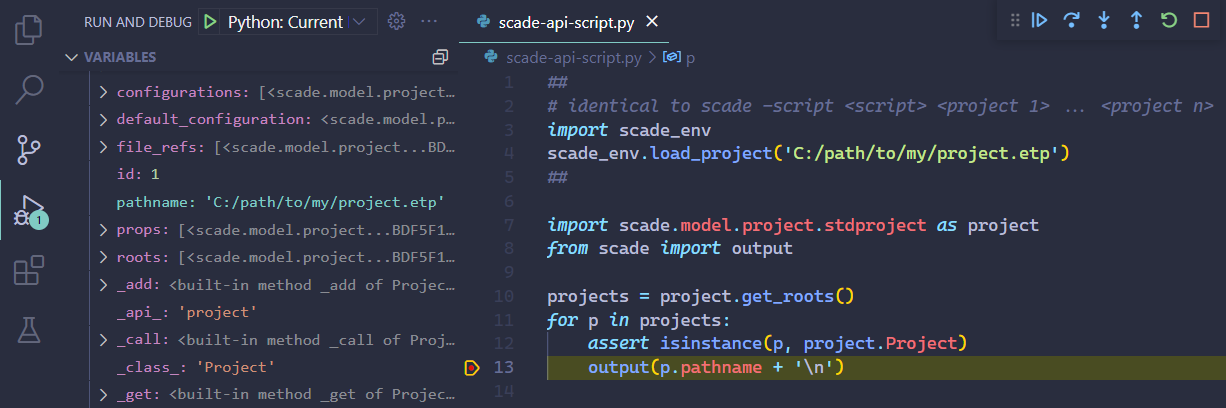
Debugging a SCADE Python script in VSCode
PyCharm
PyCharm (jetbrains.com/pycharm) is another popular IDE, specific to Python.
Project creation & configuration
Click “File” then “New Project…” to open this dialog:
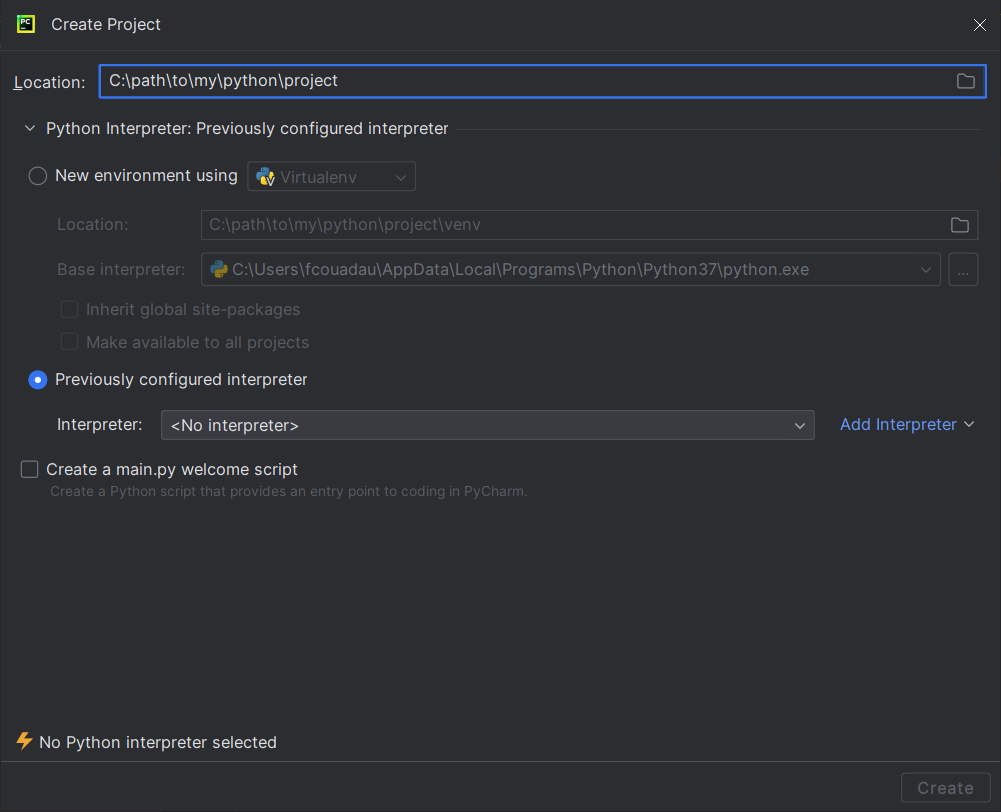
New PyCharm project
Click “Add Interpreter” to add the Python executable delivered with your installation of SCADE:
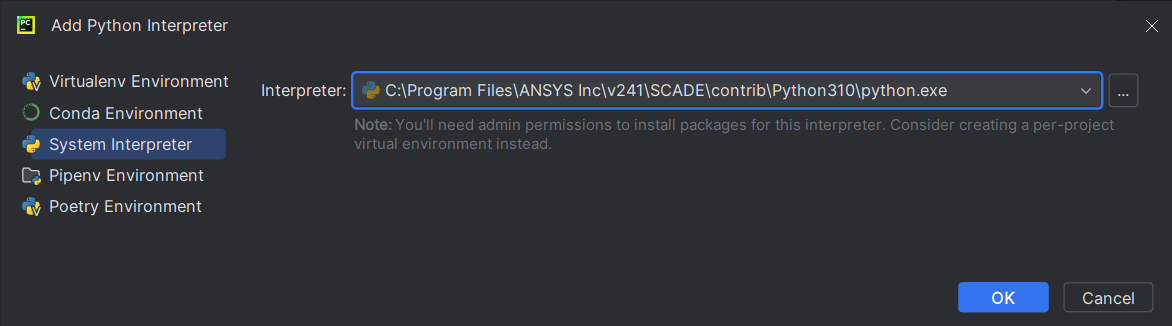
Adding a Python interpreter to PyCharm
Complete project creation by clicking “OK”, then “Create”.
Click “File” then “Settings…” to open the settings window. Configure “Project Structure” as follows:
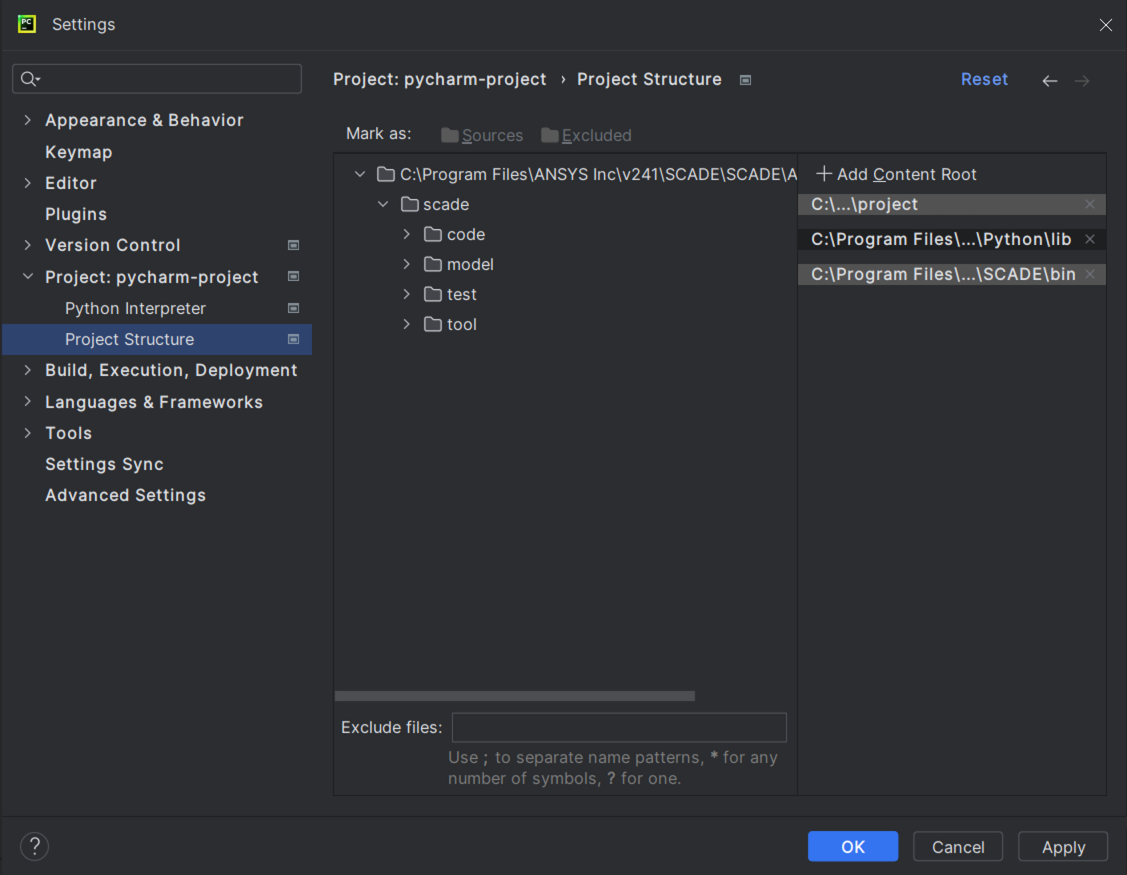
PyCharm project structure to work with SCADE APIs
Use button “+ Add Content Root” to add the following folders:
SCADEAPIsPythonlibSCADEbin
This tells PyCharm to use the SCADE API sources for autocompletion services.
Results
You may run and/or debug your Python script. The debug view allows you to peek into the variables and their structure:
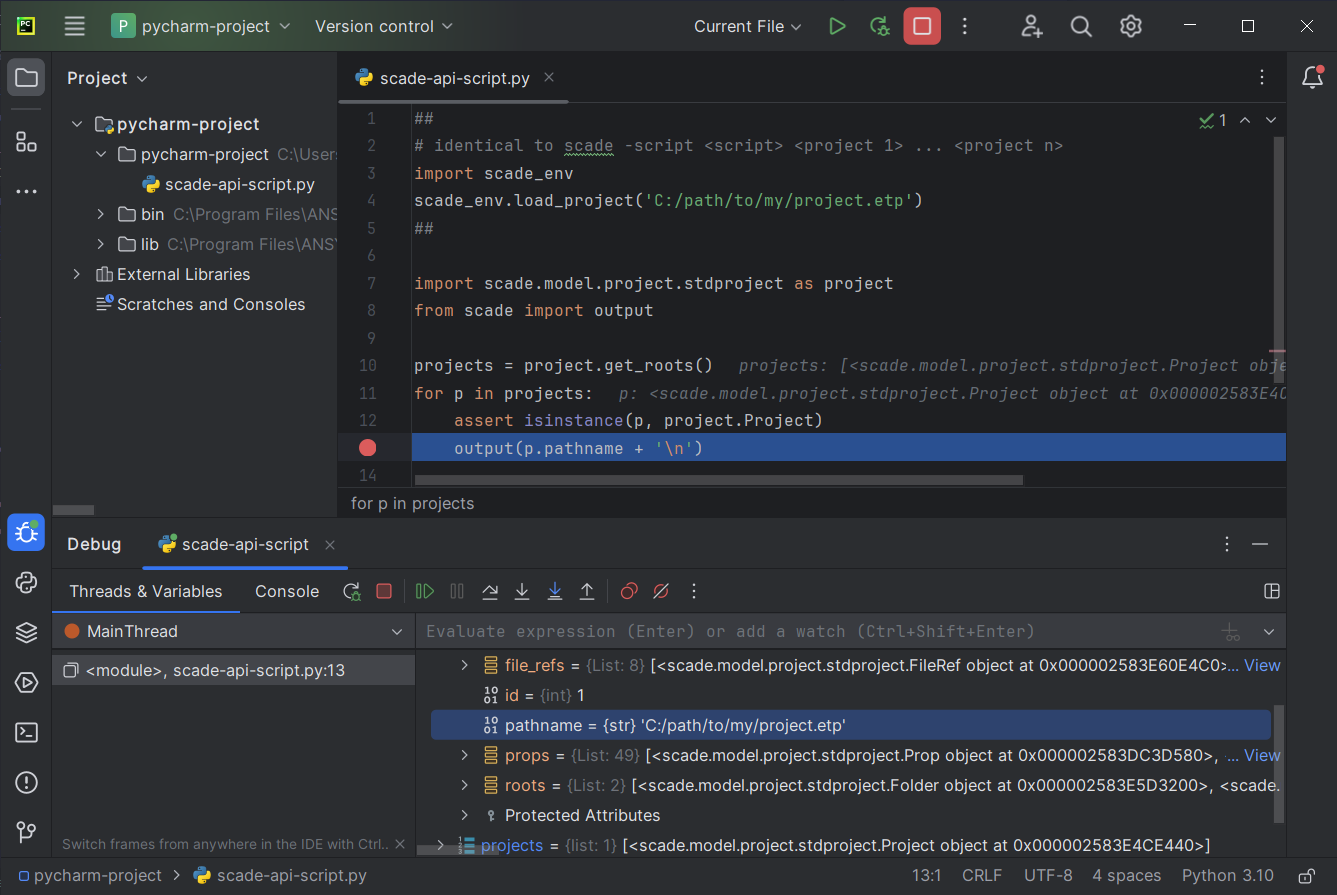
Debugging a SCADE Python script in PyCharm
Visual Studio
Visual Studio (visualstudio.microsoft.com) is a popular IDE for .NET and C++ development on Windows. It can support Python development thanks to extensions.
Installation
Upon installation of Visual Studio, make sure to tick the Python Workload:
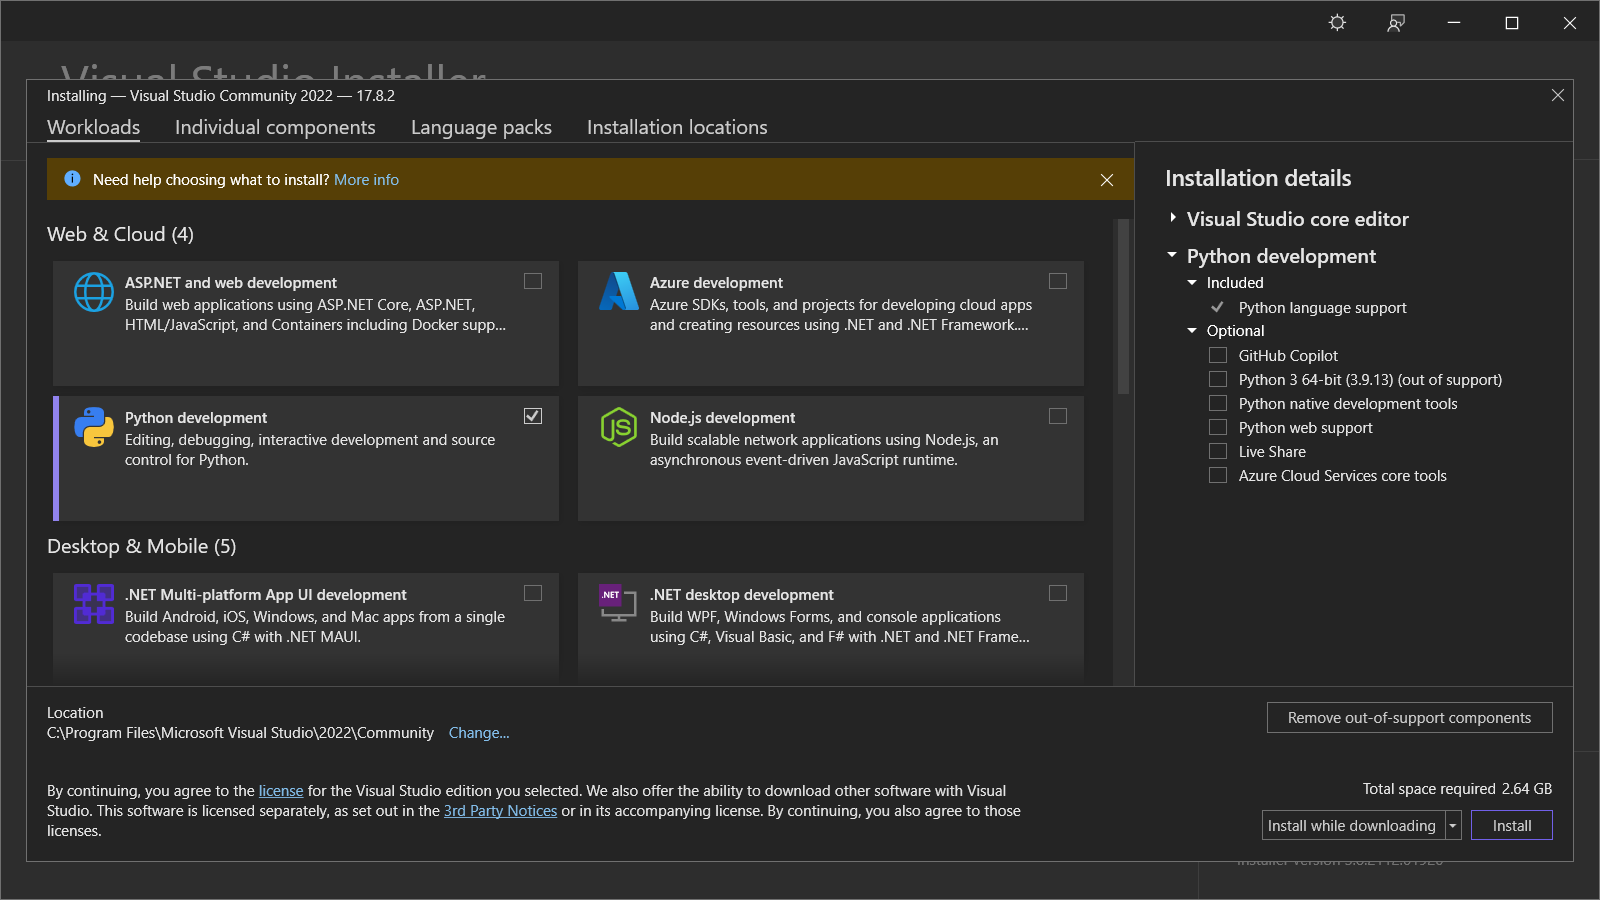
Visual Studio installation with Python Workload
Project creation & configuration
Click “File”, “New”, then “Project” to open the new project dialog. Select “From Existing Python code” then click “Next”:
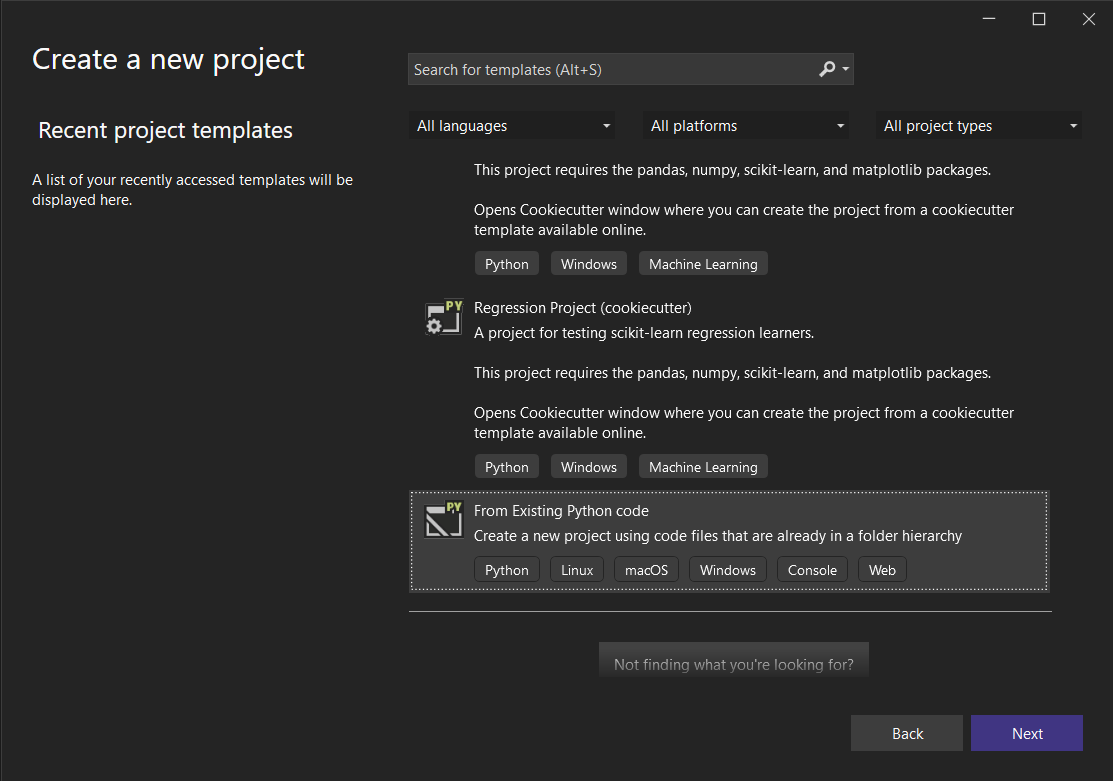
Creating a new Python project in Visual Studio
Fill in your preferred project name and path, then finalize by clicking “Create”.
Your Solution Explorer should look like this:
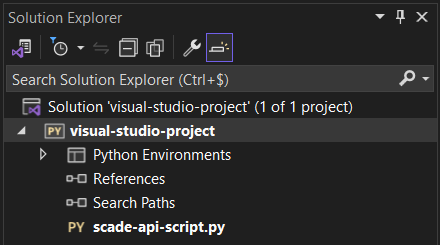
Solution Explorer before project configuration
By default, the project uses one of your standard installed Python interpreters. We recommend using the Python environment installed with SCADE.
To do so, right click “Python Environments”, then “View All Python Environments”. Click “Add Environment” and fill the pop-up as follows:
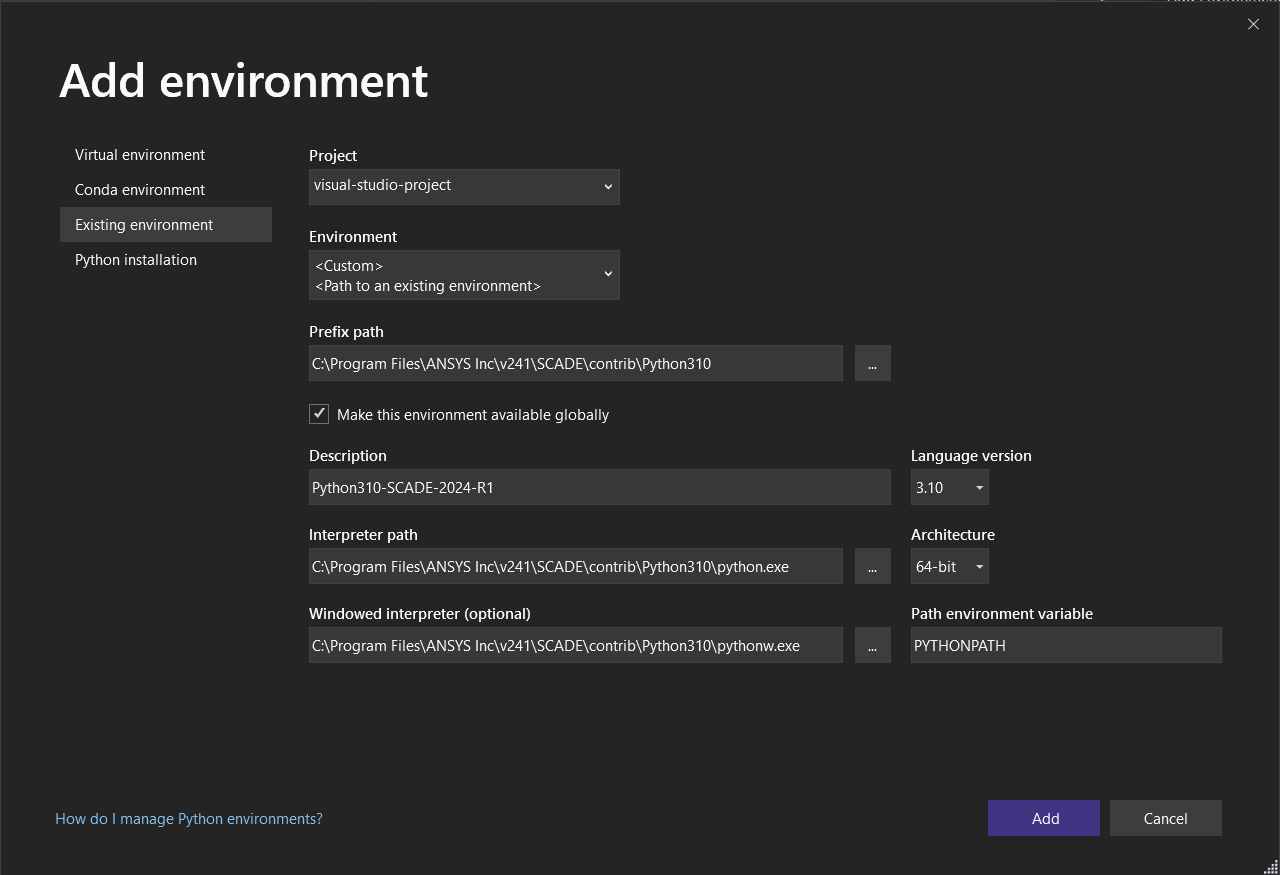
Adding the SCADE Python environment to Visual Studio (shown for SCADE 2024 R1)
Click “Add” to apply your changes. The new Python environment should now be selected in your Solution Explorer view.
Next, right-click “Search Paths” and select “Add Folder to Search Path…” twice to add the following folders:
SCADEAPIsPythonlibSCADEbin
This tells Visual Studio to use the SCADE API sources for autocompletion services.
Make sure to drop the sample Python script into your project folder.
Your Solution Explorer view should now look as follows:
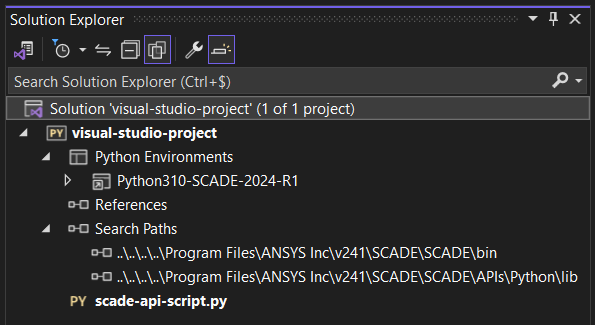
Complete project structure
Results
You may run and/or debug your Python script. The debug view allows you to peek into the variables and their structure:
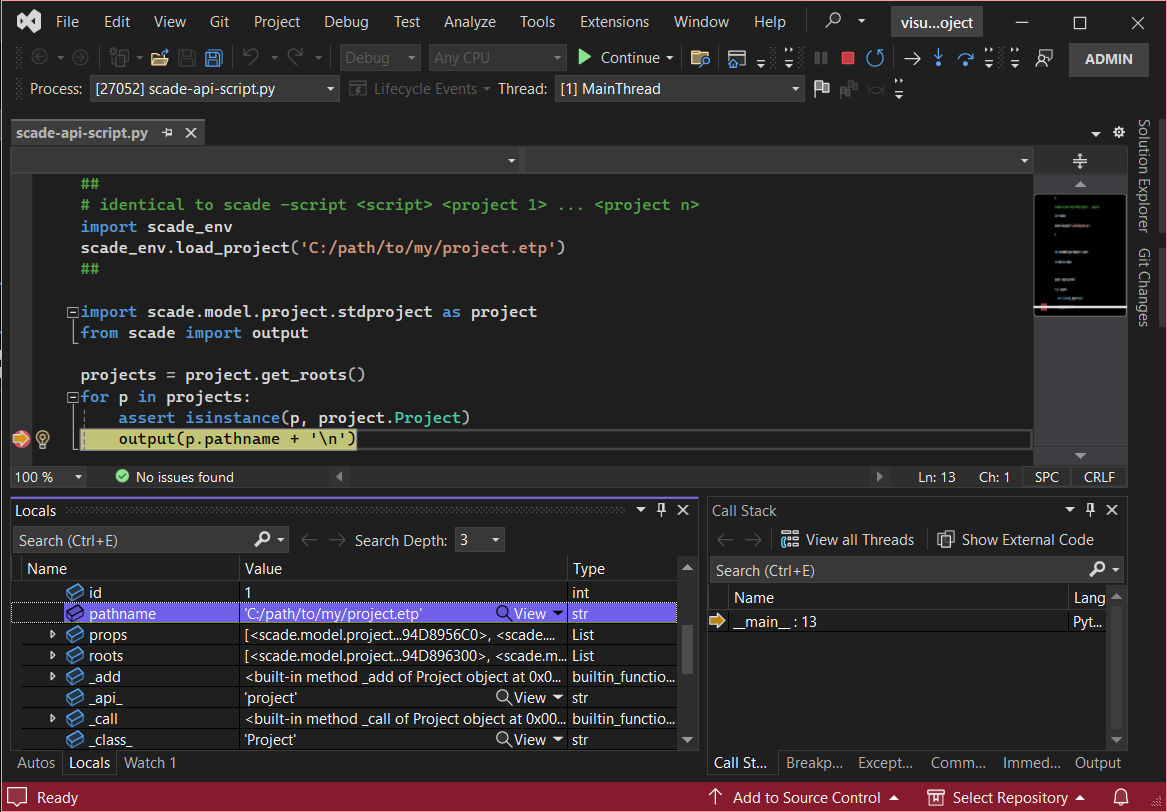
Debugging a SCADE Python script in Visual Studio
Questions?
Once this small test script works in your IDE of choice, you are ready to go! Remember to refer to the API documentation over at developer.ansys.com/scade as you develop.
If you have questions or feedback, don’t hesitate to ask our Ansys expert community.
About the author
|

|
Jean Henry (LinkedIn) is a Senior Principal Product Specialist at Ansys. He has been working on the SCADE product since its inception, more than 30 years ago. He has expertise in software development, testing and integration.
|