Information Required When Contacting Support
Introduction
When contacting Support about an issue, please provide the information below. The more details you share, the faster we can investigate and resolve the problem.
Information to Provide
1. Basic Information
- Customer Number
- Organization Number
- Application name and version
2. Actions Performed
Please describe what you did in as much detail as possible, including:
- When the issue occurred (date, time, and time zone)
- Steps you performed
- Frequency (always reproducible or intermittent)
3. Issue Description and Error Messages
- A clear description of the issue
- The full error message (exact text)
If available, also include:
4. IDs for Job Execution Failures
If job execution failed, include the following IDs:
- Project ID
- Job ID
- Simulation ID
5. HAR File for Portal Issues
If an issue occurs while operating the portal, collect and provide a HAR file captured during the operation.
How to Retrieve the Information
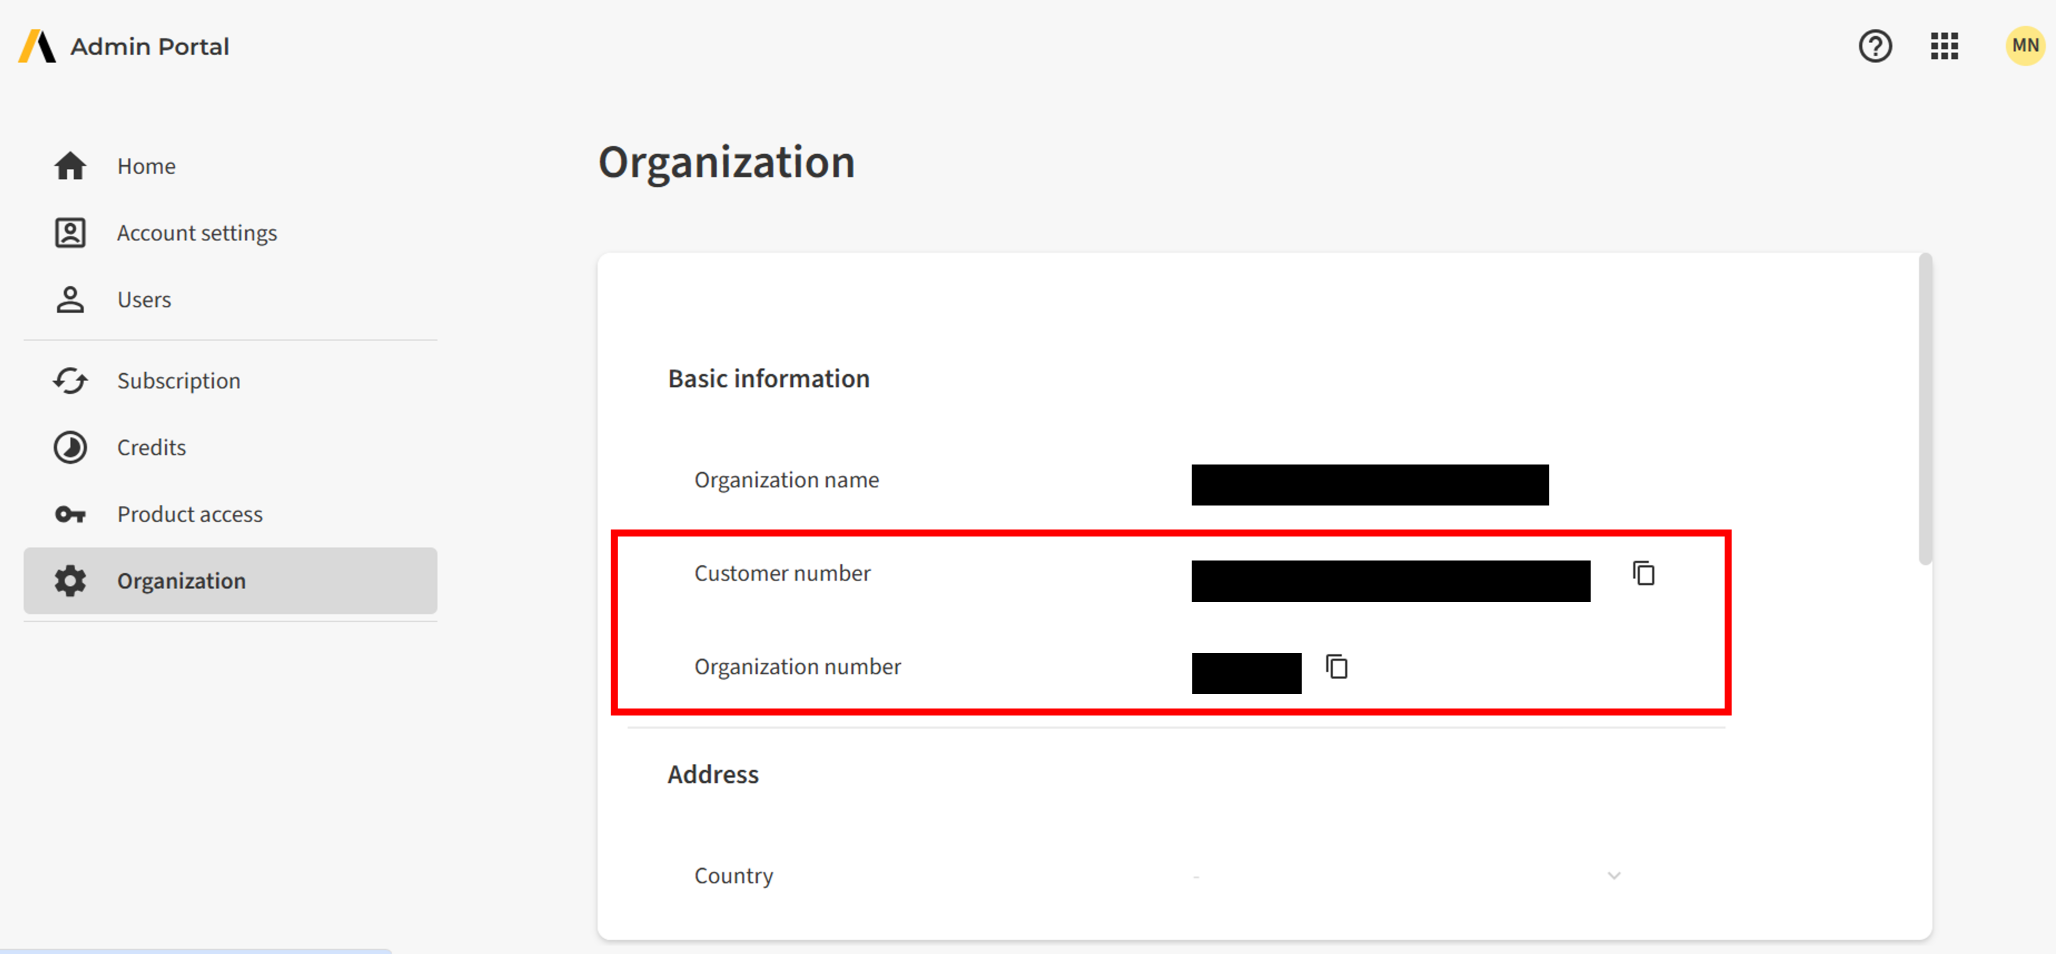
A. Basic Information (Customer Number / Organization Number)
- Sign in to Ansys Admin Portal.
- Select Organization.
- Copy the required value:
- Customer Number
- Organization Number
B. Project ID / Job ID / Simulation ID
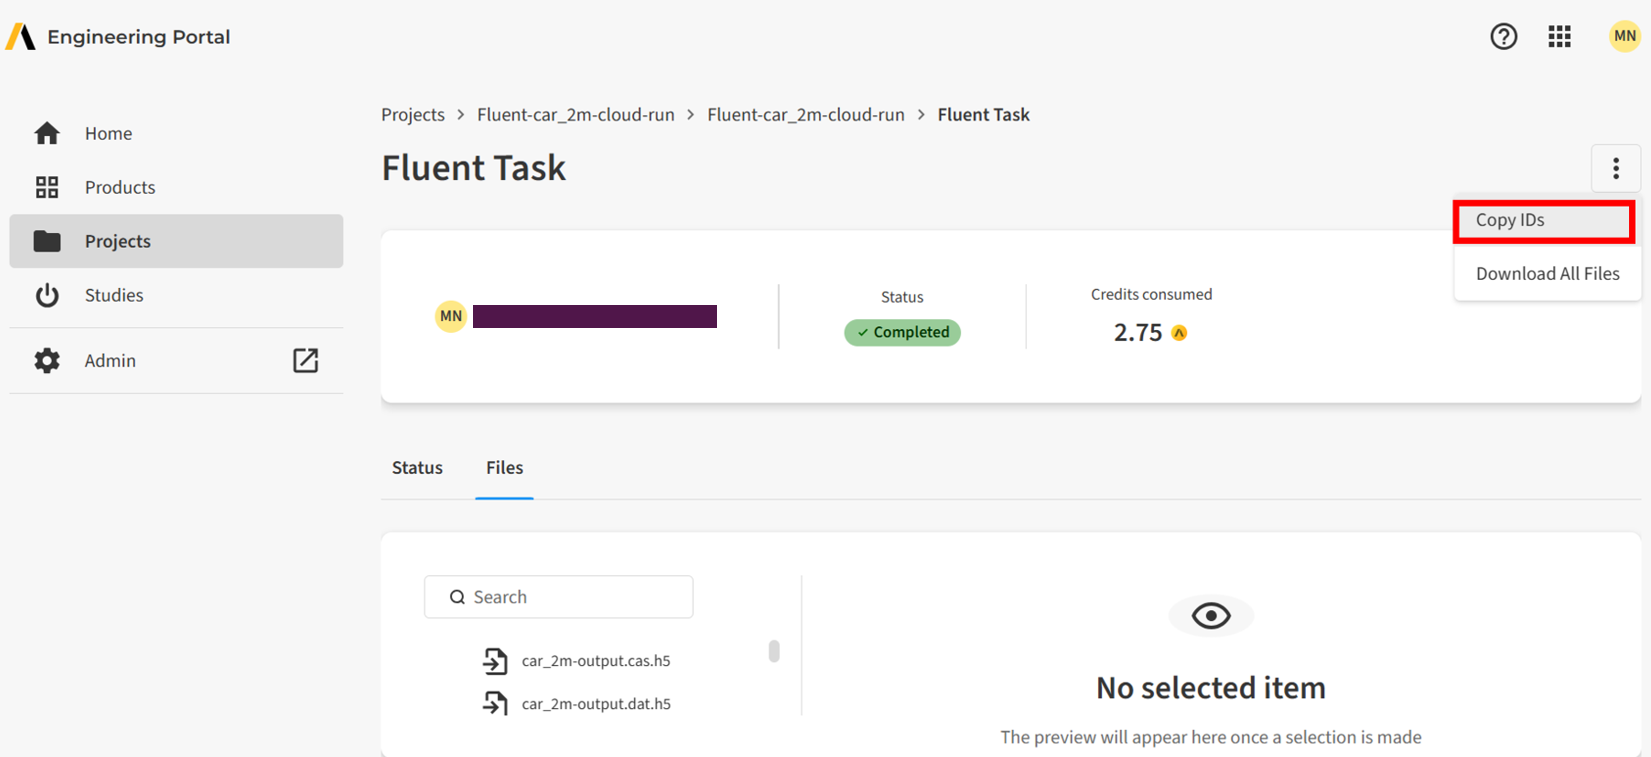
- Sign in to Ansys Engineering Portal.
- Select Projects (or Study if no project is available).
- Select the project name (or Study if no project is available).
- Select the job name.
- Select the simulation name.
- Open the kebab menu (three dots).
- Select Copy IDs.
C. HAR File for Portal Operations (Chrome Example)
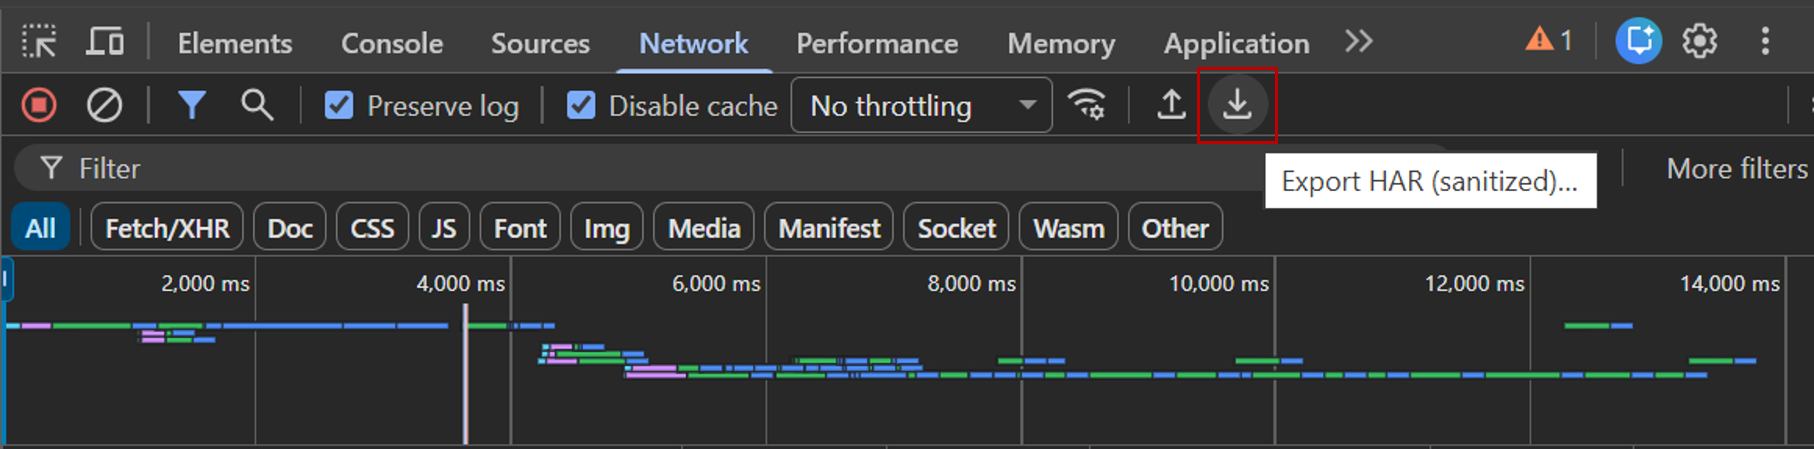
To extract a HAR file, first generate it in your browser's Developer Tools. Open the Network tab, make sure recording is enabled (red circle), enable Preserve log, and then reproduce the issue. After capture is complete, export and save the HAR file.
Step-by-step:
- Open your browser.
- Press F12 to open Developer Tools.
- Go to the webpage URL and reproduce the issue while Developer Tools remains open.
- If the webpage is already open, refresh the page first and then reproduce the issue.
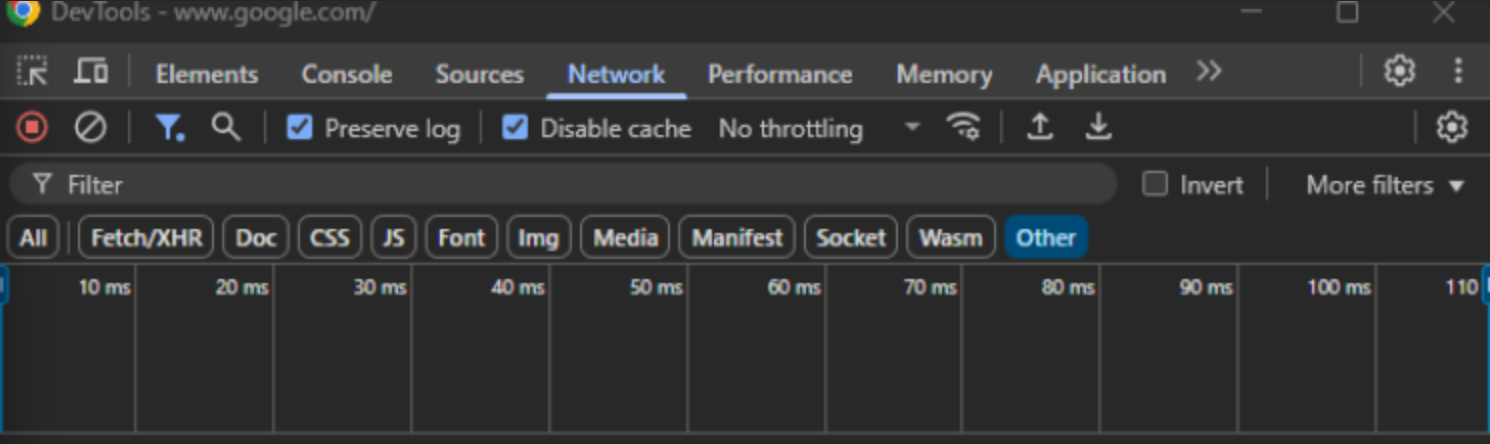
- In Developer Tools, open the Network tab. Confirm recording is active and Preserve log is enabled.
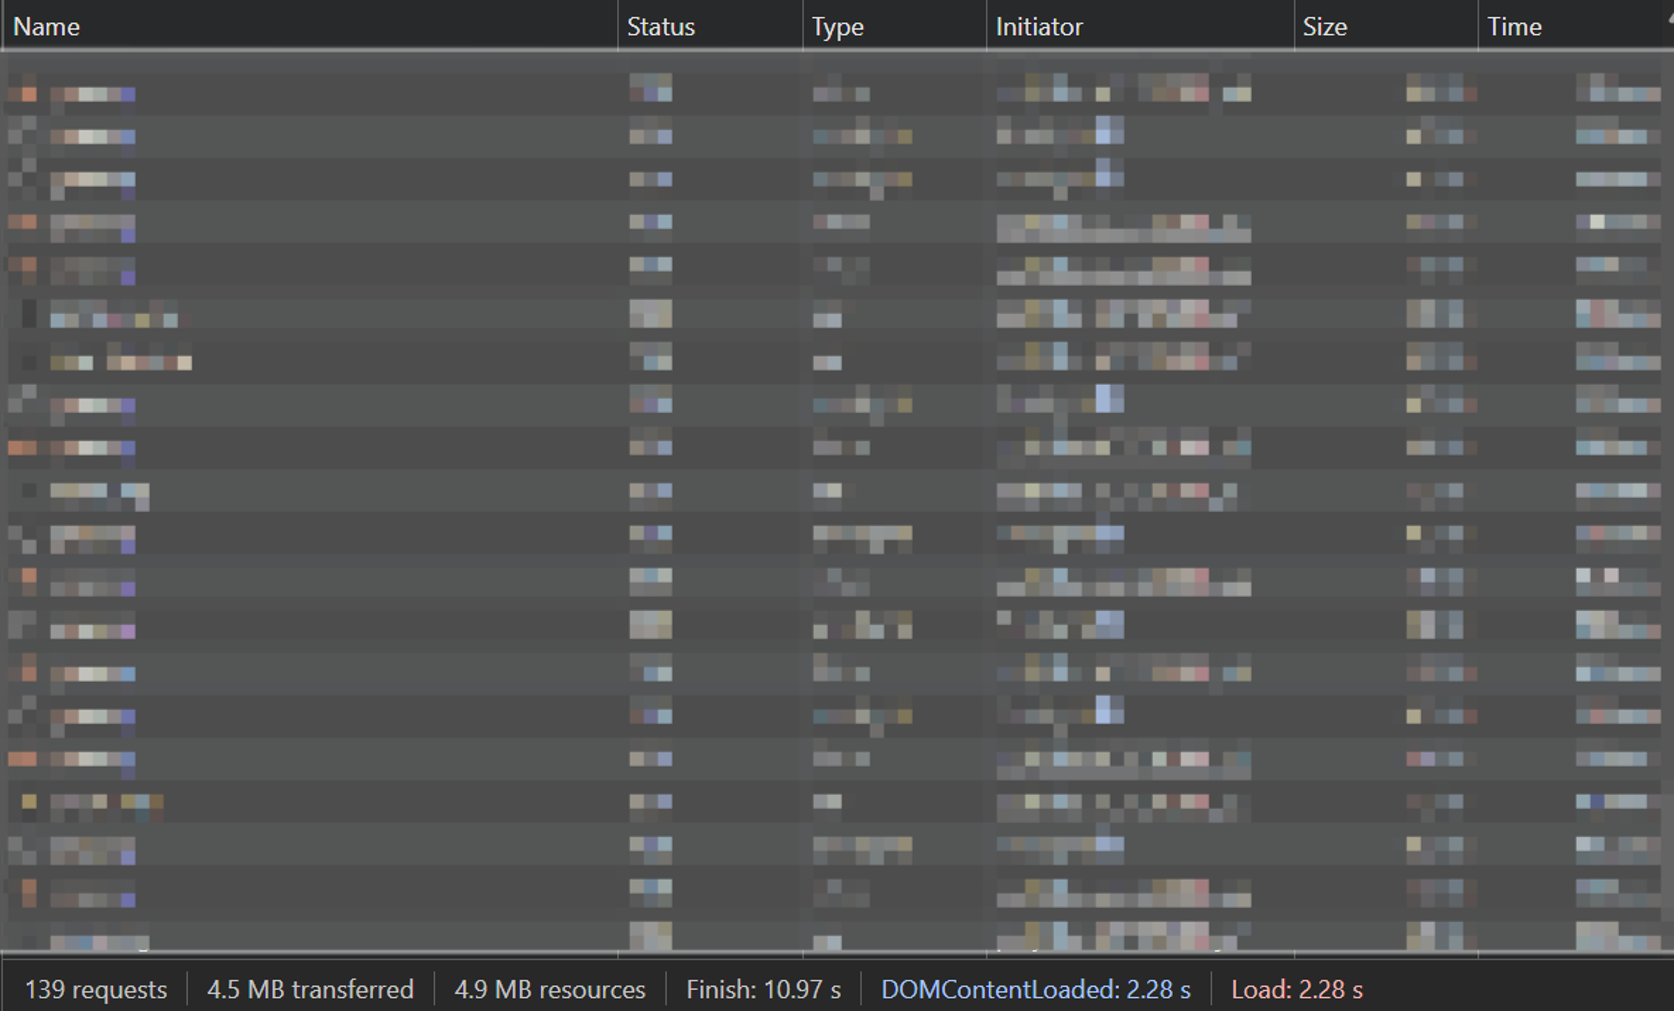
- Verify that request entries are listed in the Network table while you reproduce the issue.
- Click the Export HAR icon (downward arrow/download icon) to save the file.
- When prompted, enter a filename and choose a save location for the .har file.
- Send the .har file to your ACE contact.


















 You are navigating away from the AIS Discovery experience