Mesh — Lesson 4
Launch the Mesher
Now that we have completed creating the geometry of the domain, we are ready to mesh it. The meshing step chops up the domain into little chunks called cells or elements. The solver approximates the governing equations and/or boundary conditions on each of these chunks. The result is a large system of simultaneous algebraic equations which we hand over to the computer to solve.
Return to the Project Schematic Window. In this window, double click the Mesh box ![]() to launch the mesher.
to launch the mesher.
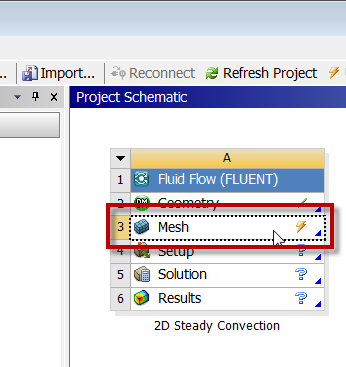
Twiddle your thumbs and try to avoid checking Facebook while the meshing application launches. If a Meshing Options window shows up to the right, you can dismiss it.
Mapped Face Meshing
For users of Ansys version 16, mapped face meshing is now called Face Meshing.
First, we will apply "mapped face meshing" to get a regular mesh. In the Outline window, click ![]() in the tree. This will show the meshing options in the main menu bar (look just above the tree outline). In the meshing options, select Mesh Control > Mapped Face Meshing.
in the tree. This will show the meshing options in the main menu bar (look just above the tree outline). In the meshing options, select Mesh Control > Mapped Face Meshing.
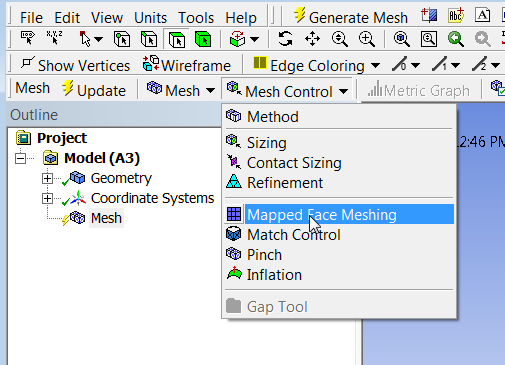
In the Graphics window, click on the rectangle to select it, then in the Details window, click Geometry > Apply.
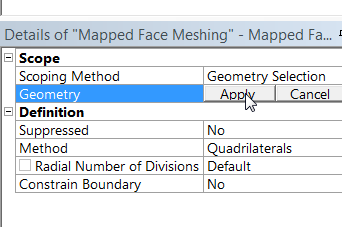
This will apply "Mapped Face Meshing" to the rectangle, which will yield a regular mesh.
Edge Sizing
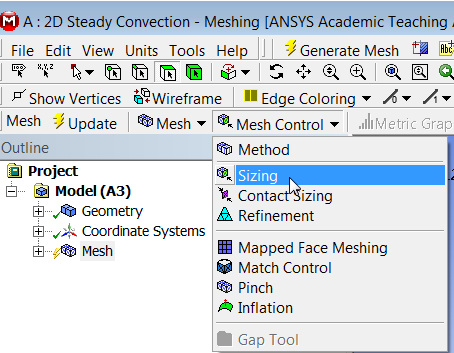
We will control the mesh size by specifying the size of the divisions to be used on the edges of the rectangle. To create the edge sizings, make sure Mesh is highlighted in the tree. Then select Mesh Control > Sizing.

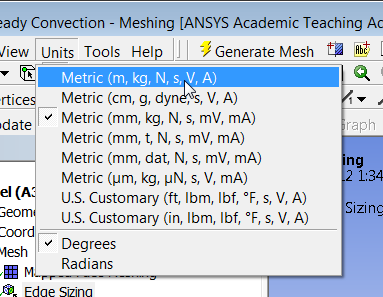
We'll be applying the sizing in meters. So check that the units are set to Metric (m, kg ...).
Since we'll be applying the sizing to edges, select the edge selection filter by clicking on it.
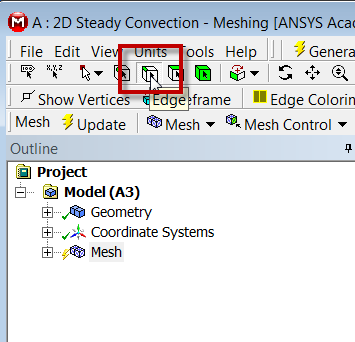
Select Zoom to Fit as shown in the snapshot below to fit the entire geometry in the graphics window. Hold down the left mouse button and drag over the four horizontal edges (two top and two bottom). The surfaces will be highlighted in green when they've been selected.
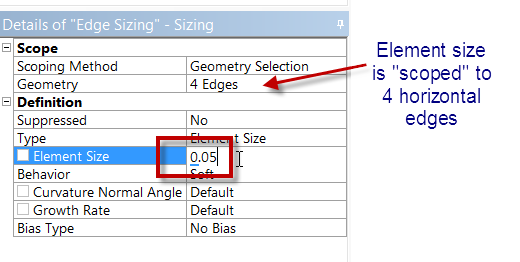
In the details window, select Geometry > Apply. Now the mesher knows which edges to apply the sizing to. Ensure that Type is set to Element Size, then change the Size from Default to 0.05 m as shown below. This will set each division size on the corresponding edges to 0.05 m. (If we want a finer mesh, we can input a smaller size.)
Now, we will create an edge sizing for the vertical edges of the geometry. Create another edge sizing, and this time, choose the left and right vertical edges of the geometry by holding down the Ctrl key and selecting each of them, and go to Geometry > Apply. Change the Type to the Number of Divisions. Next, specify Number of Divisions as 30. Note that one can specify the Element Size or Number of Divisions depending on which is more convenient.
Before generating the mesh, we will turn off the Advanced Sizing Function. Make sure that Mesh is highlighted in the tree and in the Details window, and expand Sizing. Next to Use Advanced Size Function, change from On to Off.
Generate the Mesh
In the Mesh context menu, Mesh > Generate Mesh.
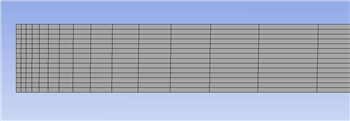
The generated mesh should now be seen. (If you don't see it at first, select ![]() in the tree outline to show the generated mesh). You can zoom in/out using the middle mouse wheel. We see that Ansys decreases the mesh size near the entrance since it sees a corner. This is fine for our case since this will better resolve the rapidly developing boundary layer near the entrance. So we won't override this.
in the tree outline to show the generated mesh). You can zoom in/out using the middle mouse wheel. We see that Ansys decreases the mesh size near the entrance since it sees a corner. This is fine for our case since this will better resolve the rapidly developing boundary layer near the entrance. So we won't override this.
Named Selections
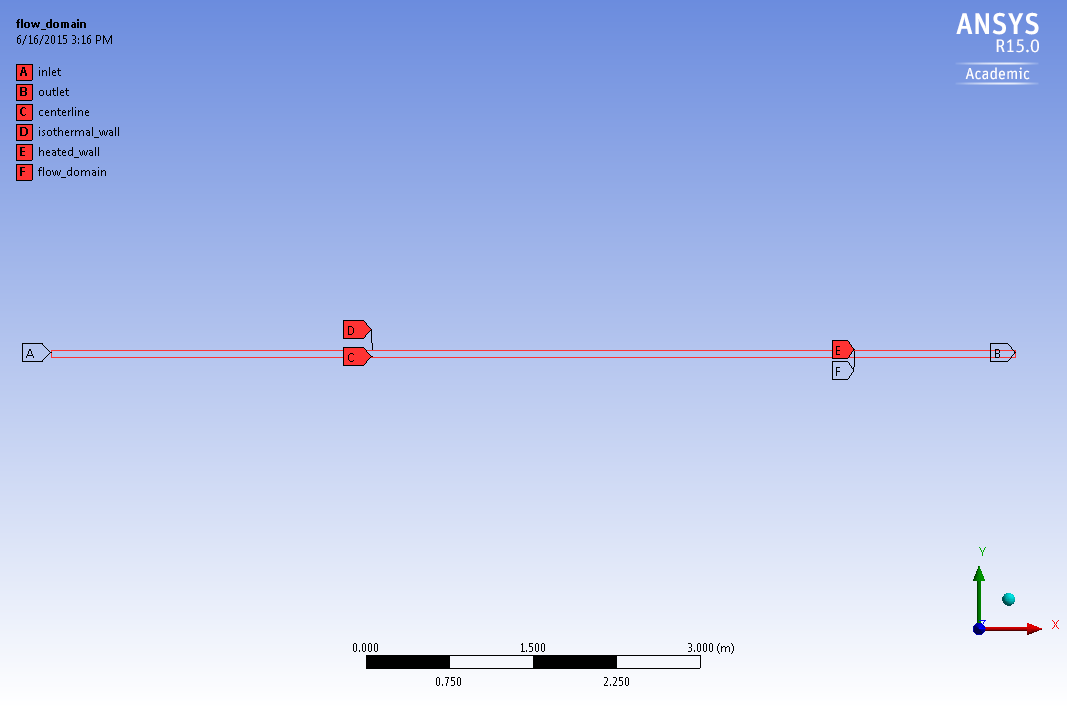
Next, we will have to specify names of different portions of the geometry to use in Fluent to define boundary conditions. Make sure the Edge Selection Filter ![]() is selected before proceeding.
is selected before proceeding.
Inlet
Select the left vertical edge of the geometry with a left mouse click — it should highlight in green. Right click and select Create Named Selection. Name the selection Inlet. Click OK once finished.
Centerline
Next, we will specify the axis/centerline of the pipe. Select the bottom surface of the pipe and create a named selection. Name it Centerline.
Isothermal Wall
We will now specify the portion of the wall that is isothermal. Select the left portion of the upper surface of the pipe. Create a named selection and call it Isothermal Wall.
Heated Wall
We will now specify the portion of the wall that is heated. Select the right portion of the upper surface of the pipe. Create a named selection and call it Heated Wall.
Outlet
We will specify the outlet of the pipe. Select the right vertical edge of the pipe. Create a named selection and call it Outlet.
Flow Domain
Finally, we specify the flow domain of the pipe. With the face selection filter, select the face of the pipe. Right click and create a named selection and call it flow domain.
Click ![]() to update all the changes made in the mesher.
to update all the changes made in the mesher.
We are done with the mesh creation, so we can now save the project and close the mesher.

