TAGGED: How To, spaceclaim
-
-
February 24, 2023 at 7:25 am
-
February 26, 2023 at 11:44 pm
Devendra Badgujar
Forum ModeratorHello Macsys Engineering
Let me check and get back to you.
-
March 8, 2023 at 8:03 am
Devendra Badgujar
Forum ModeratorHello Macsys Engineering
Apologies for the delay here. I did check for the equation of the 3d sine wave but did not find it as per your image.
Surface equation tool does not have Sine wave, but it has custom option...so if you know the 3D equation for x, y and z value, but for that we would need exact equation.
We have a script for the curve shown below, let me know if this is something you are looking for?
Attached is the script and .scdoc file for your reference. You can go through the script and try the same for the curve you would like. I know you needed a surface, but your curve is not very clear in 3d from the image. You can pull the curves to get a surface body of this.
Thank you.
🛈 This post originally contained file attachments which have been removed in compliance with the updated Ansys Learning Forum Terms & Conditions-
March 12, 2023 at 8:47 am
info
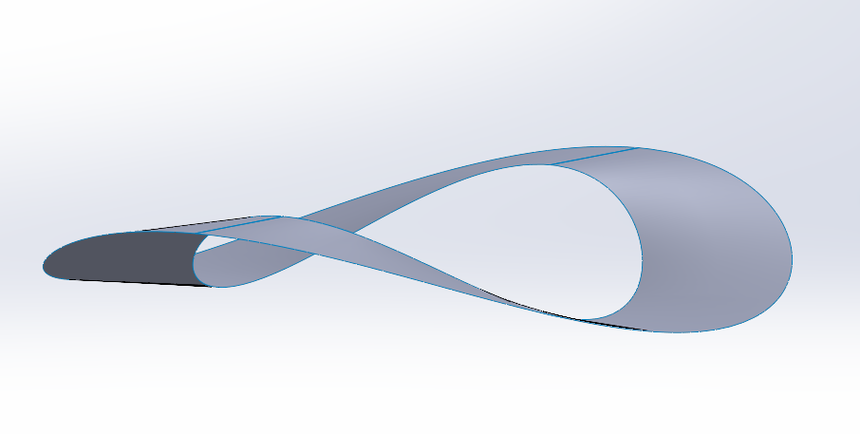
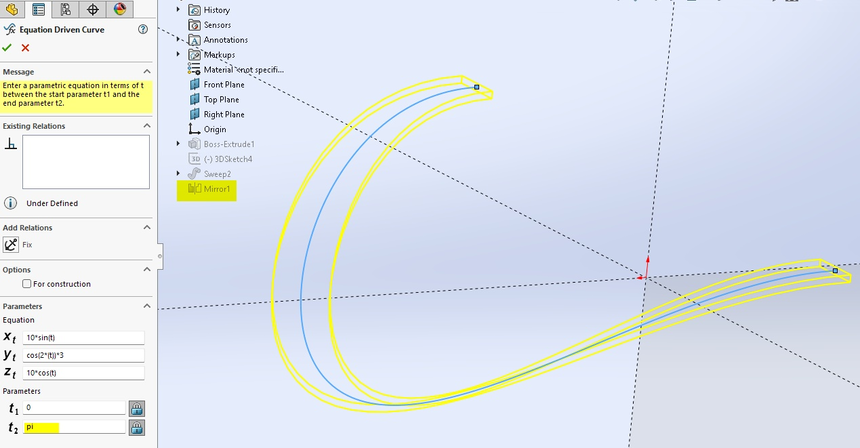
SubscriberDevendra Badgujar , thank you. No apologies needed. If focus on the curve, below is my example made in SW. Basically a cos wrapped in a circle. (in this case half a circle (pi) to solve start-end issue). The formula is in the picture.
I was not able to reproduce this in SC. As an alternative i tried polar coordinates, but also not working. Can you get this curve / formulae working in SC?
-
March 13, 2023 at 1:14 am
Devendra Badgujar
Forum ModeratorMacsys Engineering
Thanks for your update, let me try this and get back to you.
Regards.
-
-
March 24, 2023 at 2:31 am
mg
SubscriberMacsys Engineering
Devendra Badgujar
A wave washer can be created in several steps with the standard SC tools. Have used this with both SC2022R1 and SC2023R1.
The steps are:
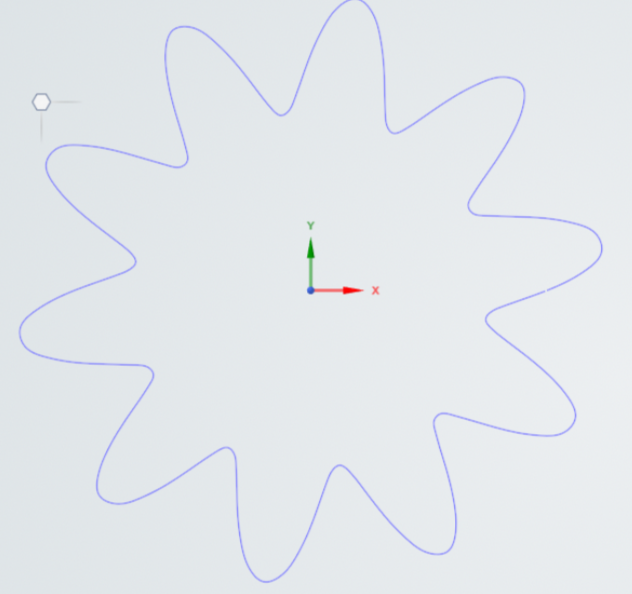
1. define the dimensions of the finished washer (see photo)
2. create a 2d wave with Design | Sketch | Equation | Sine Wave
3. create a 3d cylinder with a diameter and height based on the washer dimensions
4. align the wave start-point with the curved surface of the cylinder
5. imprint the wave on the cylinder surface with the Prepare | Analysis | Wrap tool to make a closed spline
6. pull the spline to create a surface,
7. pull the surface to complete the 3d washer material width
8. add reference marks or planes to enable measurements
Refer to video showing the steps. Notes below refer to marked frames in the video.
Cannot normally see the exact SC internal values for calculated spline point locations, and this can create situations where a tool will not operate as expected, with no error information provided. Findings re this sensitivity are explained in the Notes with a 'Caution:' tag.
Notes:
1. Equation values:
(t) Endpoint: washer OD * pi.
Caution: use as many digits of precision as possible to insure that the wave endpoint exactly aligns with the start-point after wrapping, otherwise the spline loop with be open and may not Pull correctly. Also, in the Equation pane, the entered value is displayed rounded down after the cursor is moved to a new field.
(A) Amplitude = (washer overall height - material thickness) / 2, (this example, 1.5 = (4-1)/2)
(P) Period, determines the quantity of top and bottom bearing points of the washer. (this example, (t) Endpoint value / 2pi = 15 / 4 nodes = 3.75
2. Align wave with cylinder surface: +x move = washer outside radius, +y move = (A) + material thickness (2.5mm in example).
3. In theory, Pull top surface of cylinder to height of the washer - Caution: if any point of the wave is greater than this height, the Wrap operation will fail. In this example, the height is pulled to 4.1mm.
4. After Wrap, a single complete closed spline should appear. Caution: if multiple splines are created, this indicates the spline is not closed due to misalignment of the endpoints; increase the (t)-End precision.
5. To Pull the spline downward parallel to the y-axis, zoom in enough to set the exact height with the LMB only. Caution: if while pulling, the space bar is clicked and the pull dimension (1mm in this example) is entered via the keyboard, followed by enter key, the pull will fail (with unexpected behavior)
6. The Measure and Detail | Dimension tools won't resolve the overall height of the washer (4mm) since they are not planar surfaces. Add planes for determining dimensions between curved surfaces.
7. Caution: most dimensions of the finished washer are not exact, even when all the input values are exact. This is resolved when creating the drawing by changing the dimension precision or 0 or 1 decimal places.
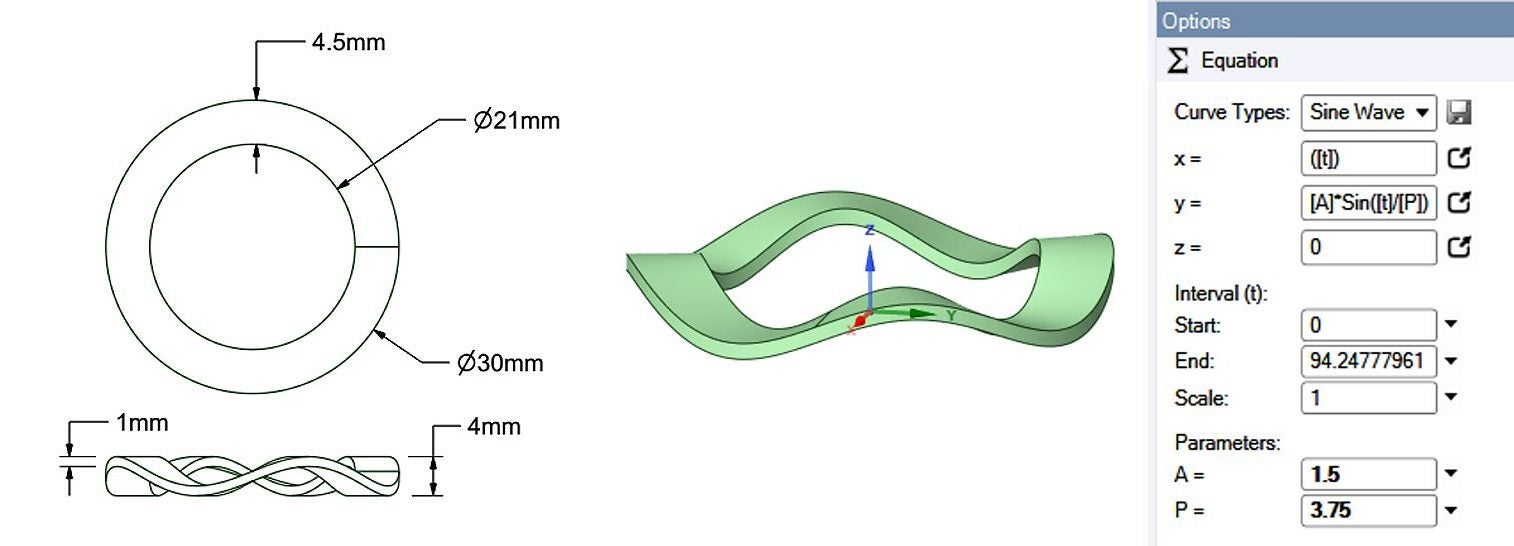 🛈 This post originally contained file attachments which have been removed in compliance with the updated Ansys Learning Forum Terms & Conditions
-
March 24, 2023 at 3:38 am
Devendra Badgujar
Forum Moderatormaike thanks for your workaround to this problem. Looks like a good way to do this.
Macsys Engineering please check the following video shared by maike to see if that helps.
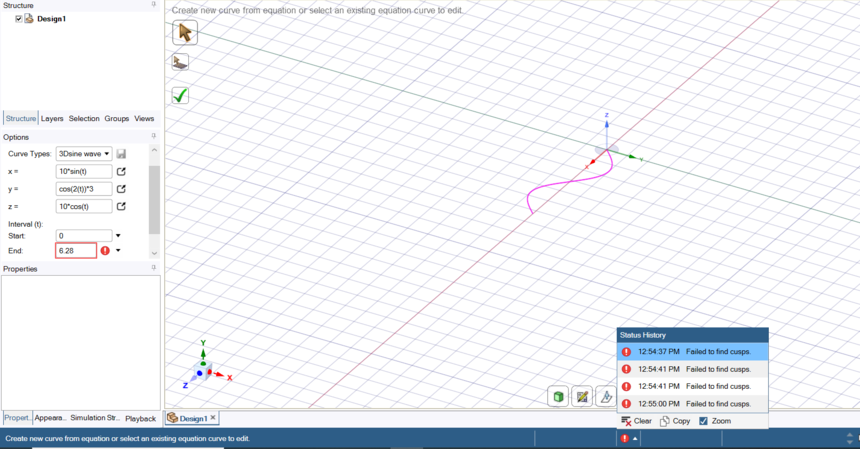
I tried the equations that you provided, somehow, they were not working and gives this ''Failed to find cusps'' error.
I have raised a bug 805394 for this, will let you know as I have more information from the developers on this.
🛈 This post originally contained file attachments which have been removed in compliance with the updated Ansys Learning Forum Terms & Conditions
-
-
March 25, 2023 at 7:19 am
info
SubscriberThank you very much maike and Devendra Badgujar
-
- The topic ‘Sine Wave 3d equation curve’ is closed to new replies.


-
5094
-
1830
-
1387
-
1248
-
1021

© 2026 Copyright ANSYS, Inc. All rights reserved.

